Your First Test (Compose Multiplatform)
This step-by-step guide walks through creating and running your first multiplatform UI test from scratch using Parikshan in a Compose Multiplatform (KMP) application with zero modifications to your UI code.
Building a standalone Android app instead? See Your First Android Test.
Prefer cloning a working project? Clone the starter template: github.com/aryapreetam/parikshan-kmp-sample
0. Prerequisites
Ensure your development environment meets the following requirements:
- Java Development Kit (JDK): Version 21 or newer (
java -version). - IDE: Android Studio (Ladybug 2024.2+ or newer) or IntelliJ IDEA (2024.2+).
- Target Platforms:
- Desktop (JVM): Runs out of the box on macOS, Linux, and Windows. No emulators required.
- Web (WasmJs): Node.js installed (Playwright browser binaries are downloaded automatically).
- Android: Android Emulator or physical device connected via ADB (
adb devices). - iOS: macOS host with Xcode installed (
xcrun simctl list).
1. Create a Compose Multiplatform Project
Generate a new Compose Multiplatform project using the official JetBrains Kotlin Multiplatform Wizard.
Wizard Configuration Settings
- Project Name:
parikshan-kmp-sample - Project ID:
org.parikshankmpsample - Targets: Check Android, Desktop, iOS, and Web (Wasm).
- Click Download and unpack the generated archive.
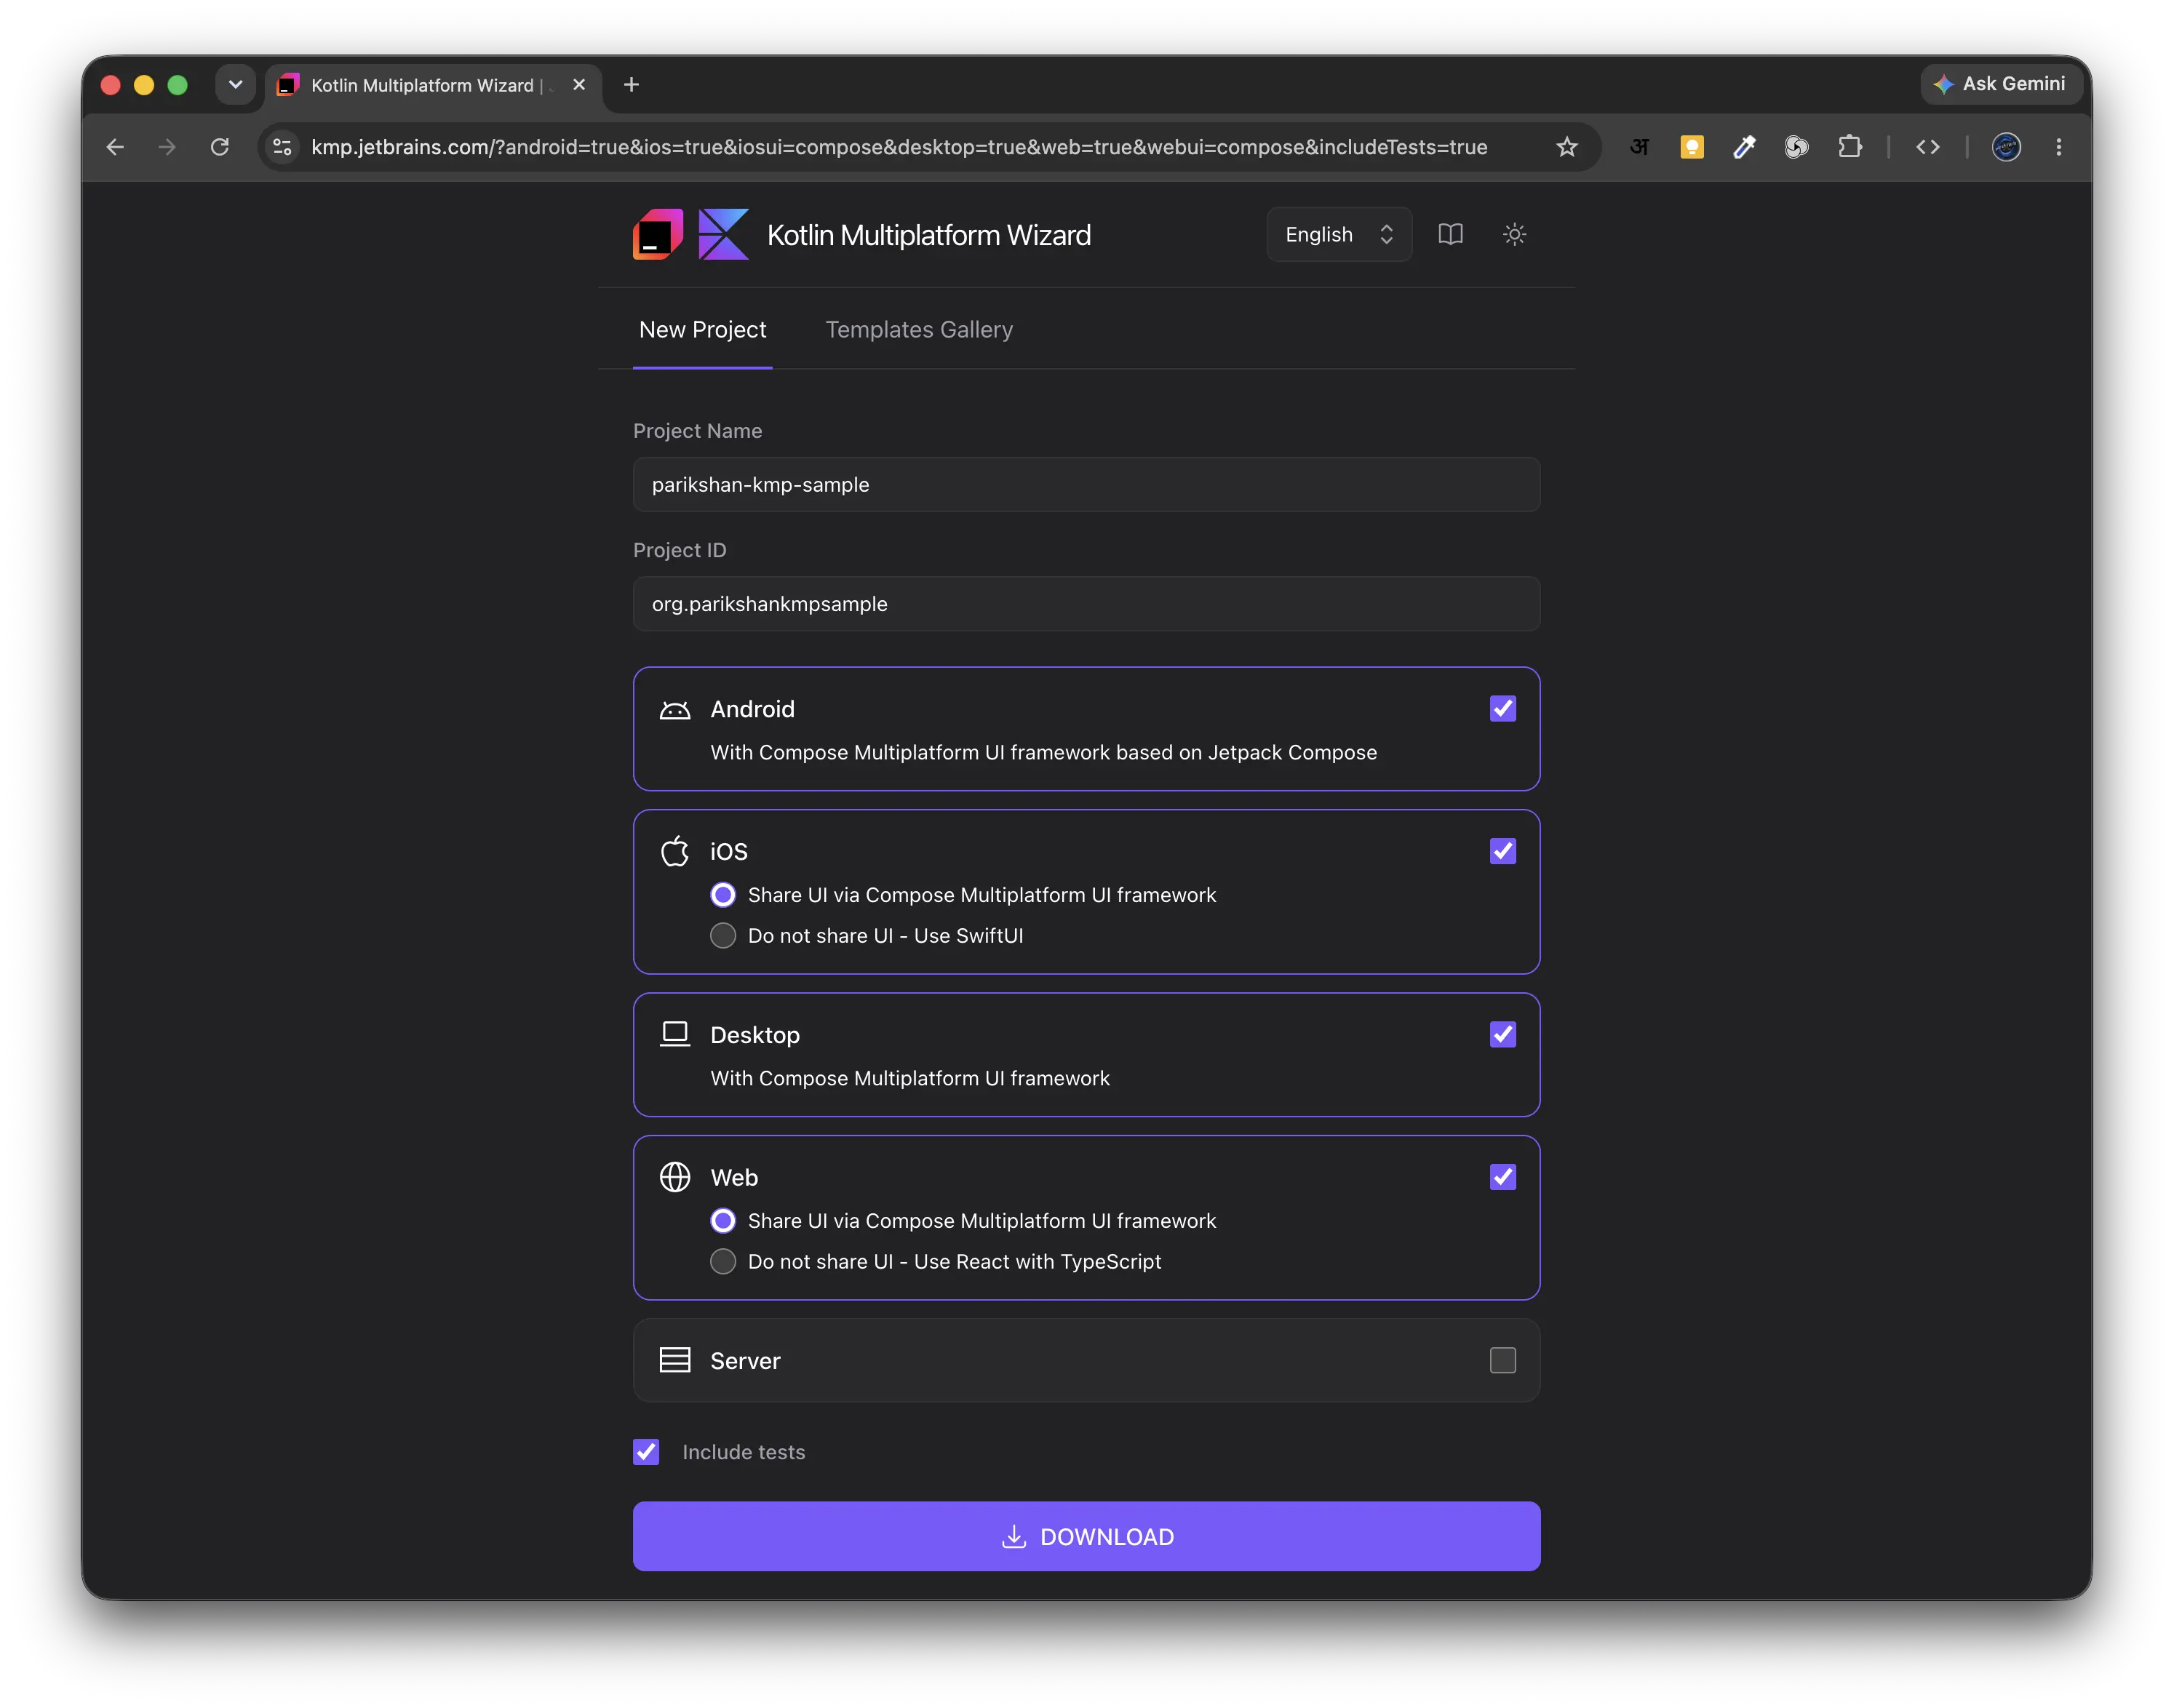
Open the extracted folder in Android Studio or IntelliJ IDEA and wait for the initial Gradle sync to complete.
Project Layout
The generated project has the following directory structure:
parikshan-kmp-sample/
├── androidApp/
├── desktopApp/
├── gradle/
├── iosApp/
├── shared/
│   ├── src/
│   │   ├── androidMain/
│   │   ├── commonMain/
│   │   │   └── kotlin/org/parikshankmpsample/App.kt   <-- Default template UI
│   │   ├── commonTest/
│   │   │   └── kotlin/org/parikshankmpsample/         <-- Your E2E tests will go here
│   │   ├── iosMain/
│   │   ├── jvmMain/
│   │   └── wasmJsMain/
│   └── build.gradle.kts                               <-- Plugin applied here
├── webApp/
├── build.gradle.kts
├── gradlew
├── gradlew.bat
└── settings.gradle.kts
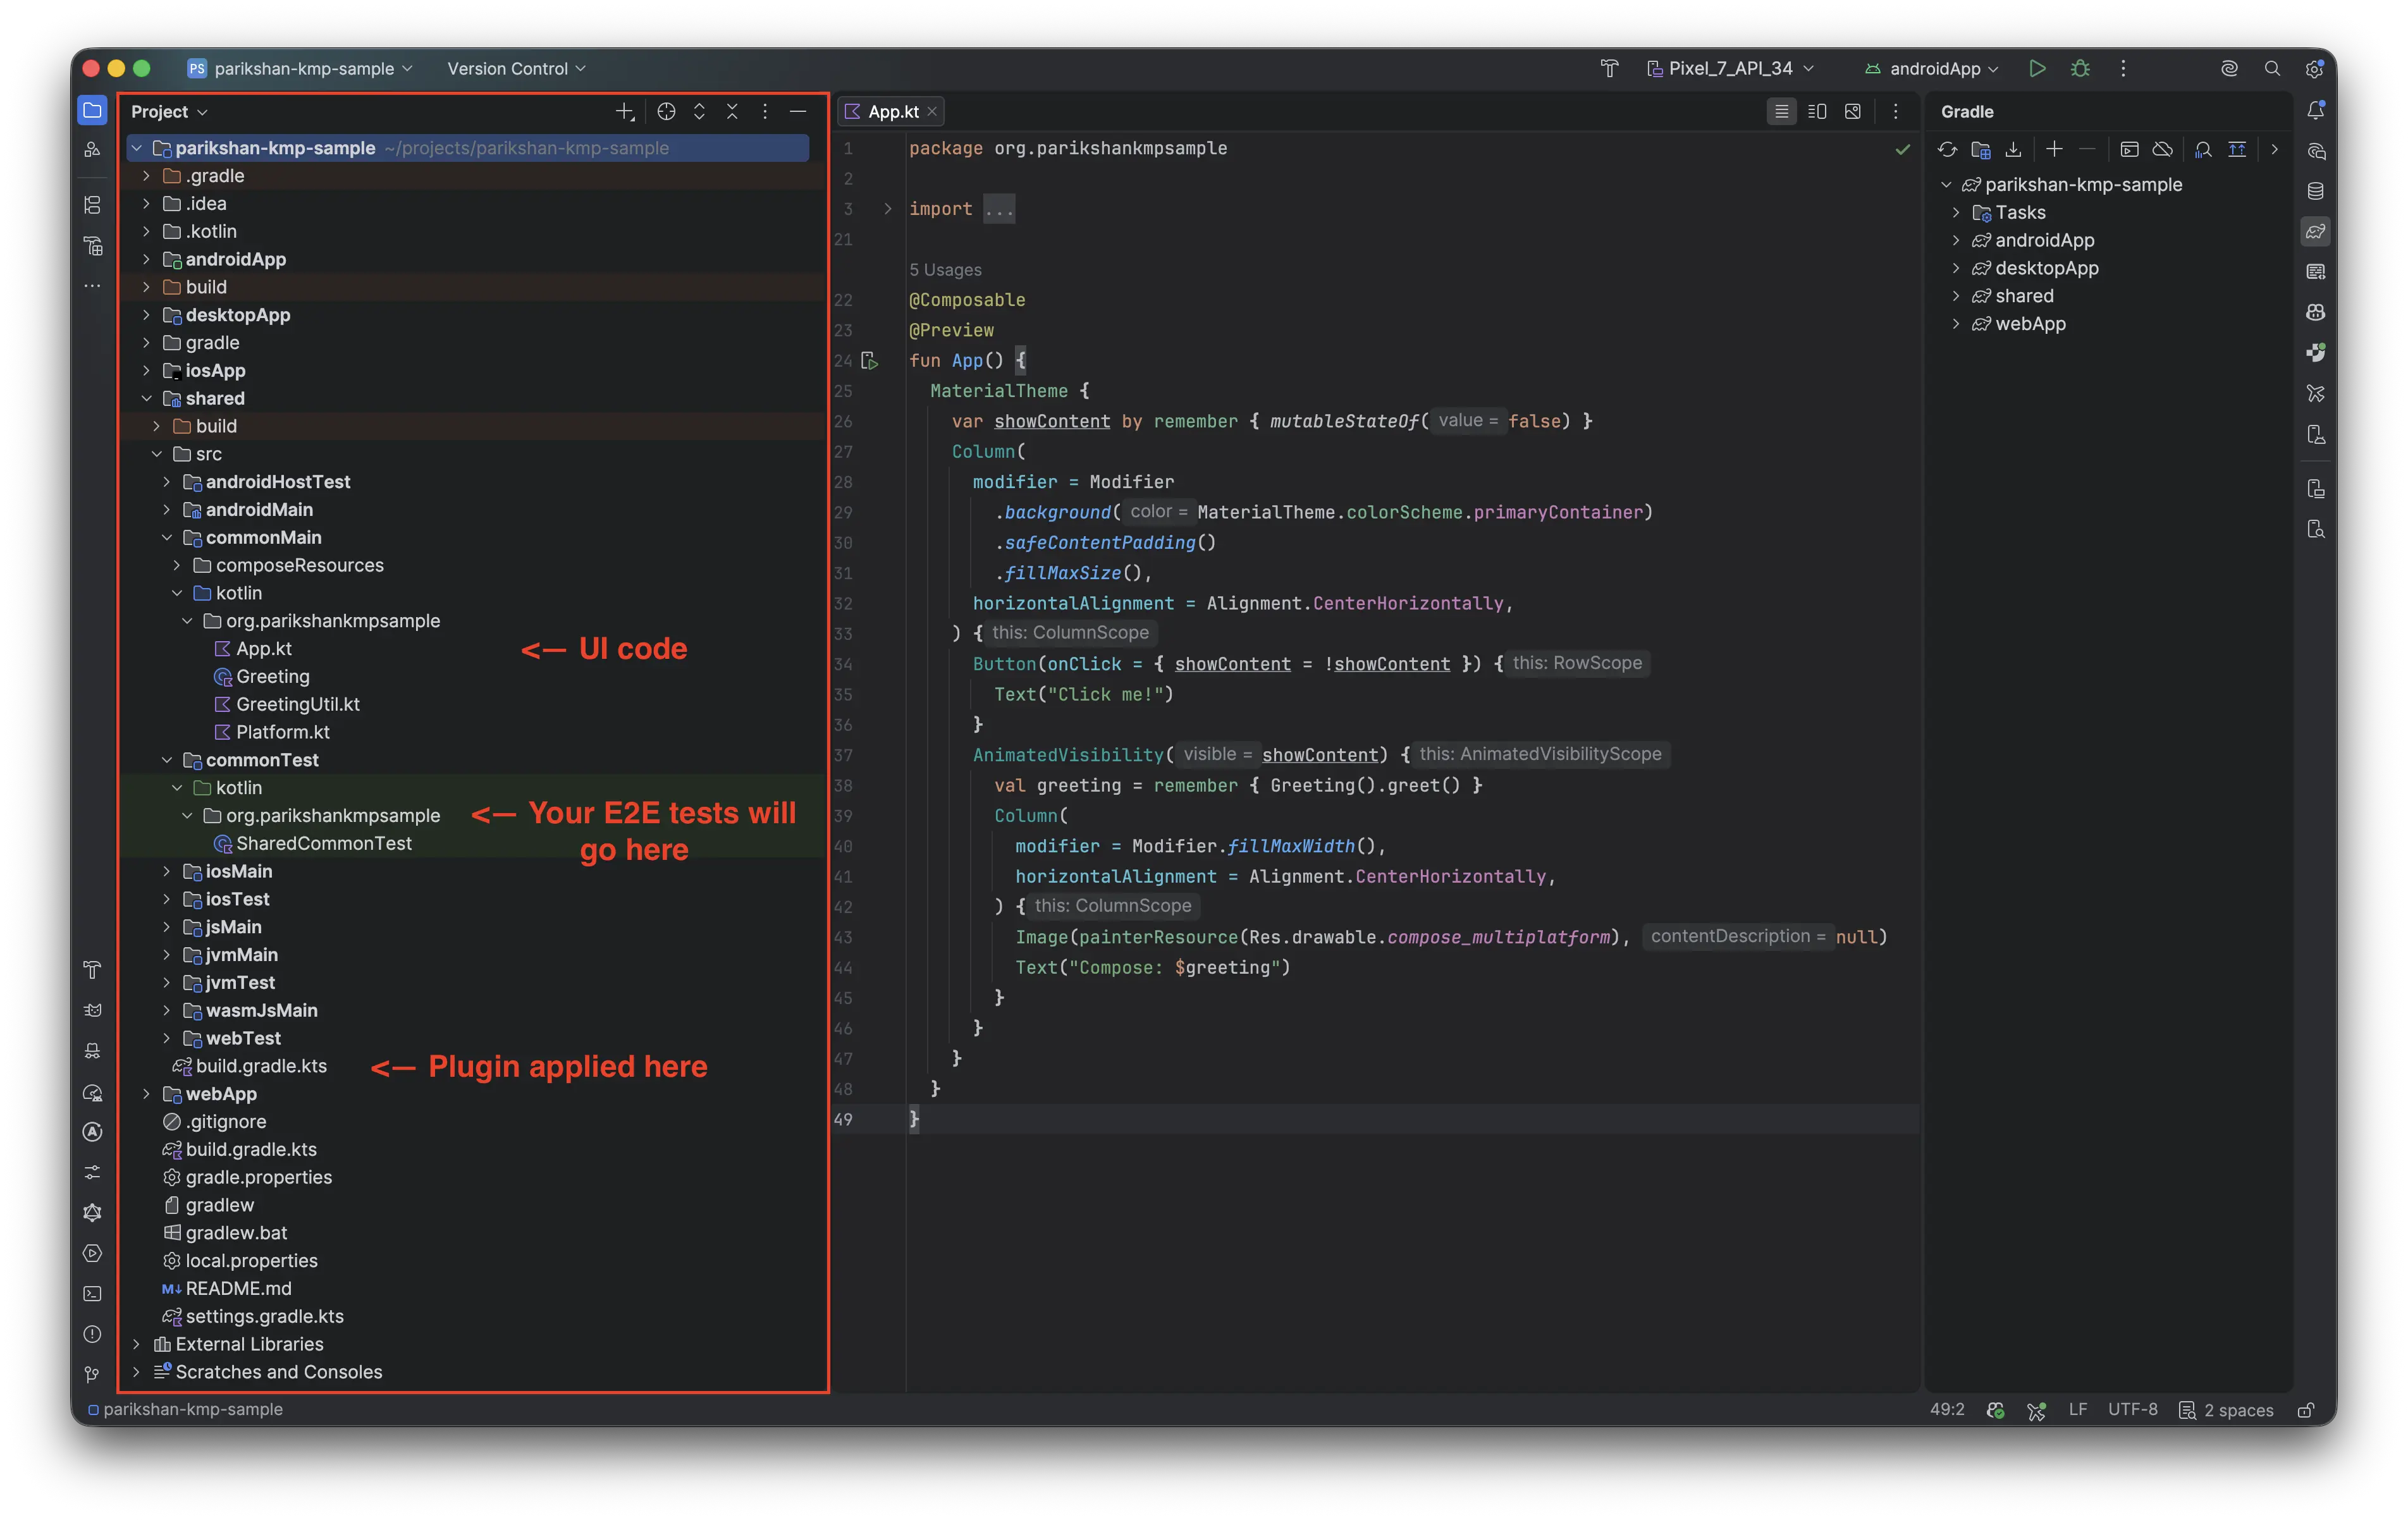
Optional: Run the Baseline Desktop App First
Before modifying the code or applying the plugin, you can verify that your JDK and Compose toolchain work properly:
- From IDE: Select
desktopApp(orjvm) in the top run configurations dropdown and click the green Run (▶) button. - From Terminal: Run
./gradlew :desktopApp:run
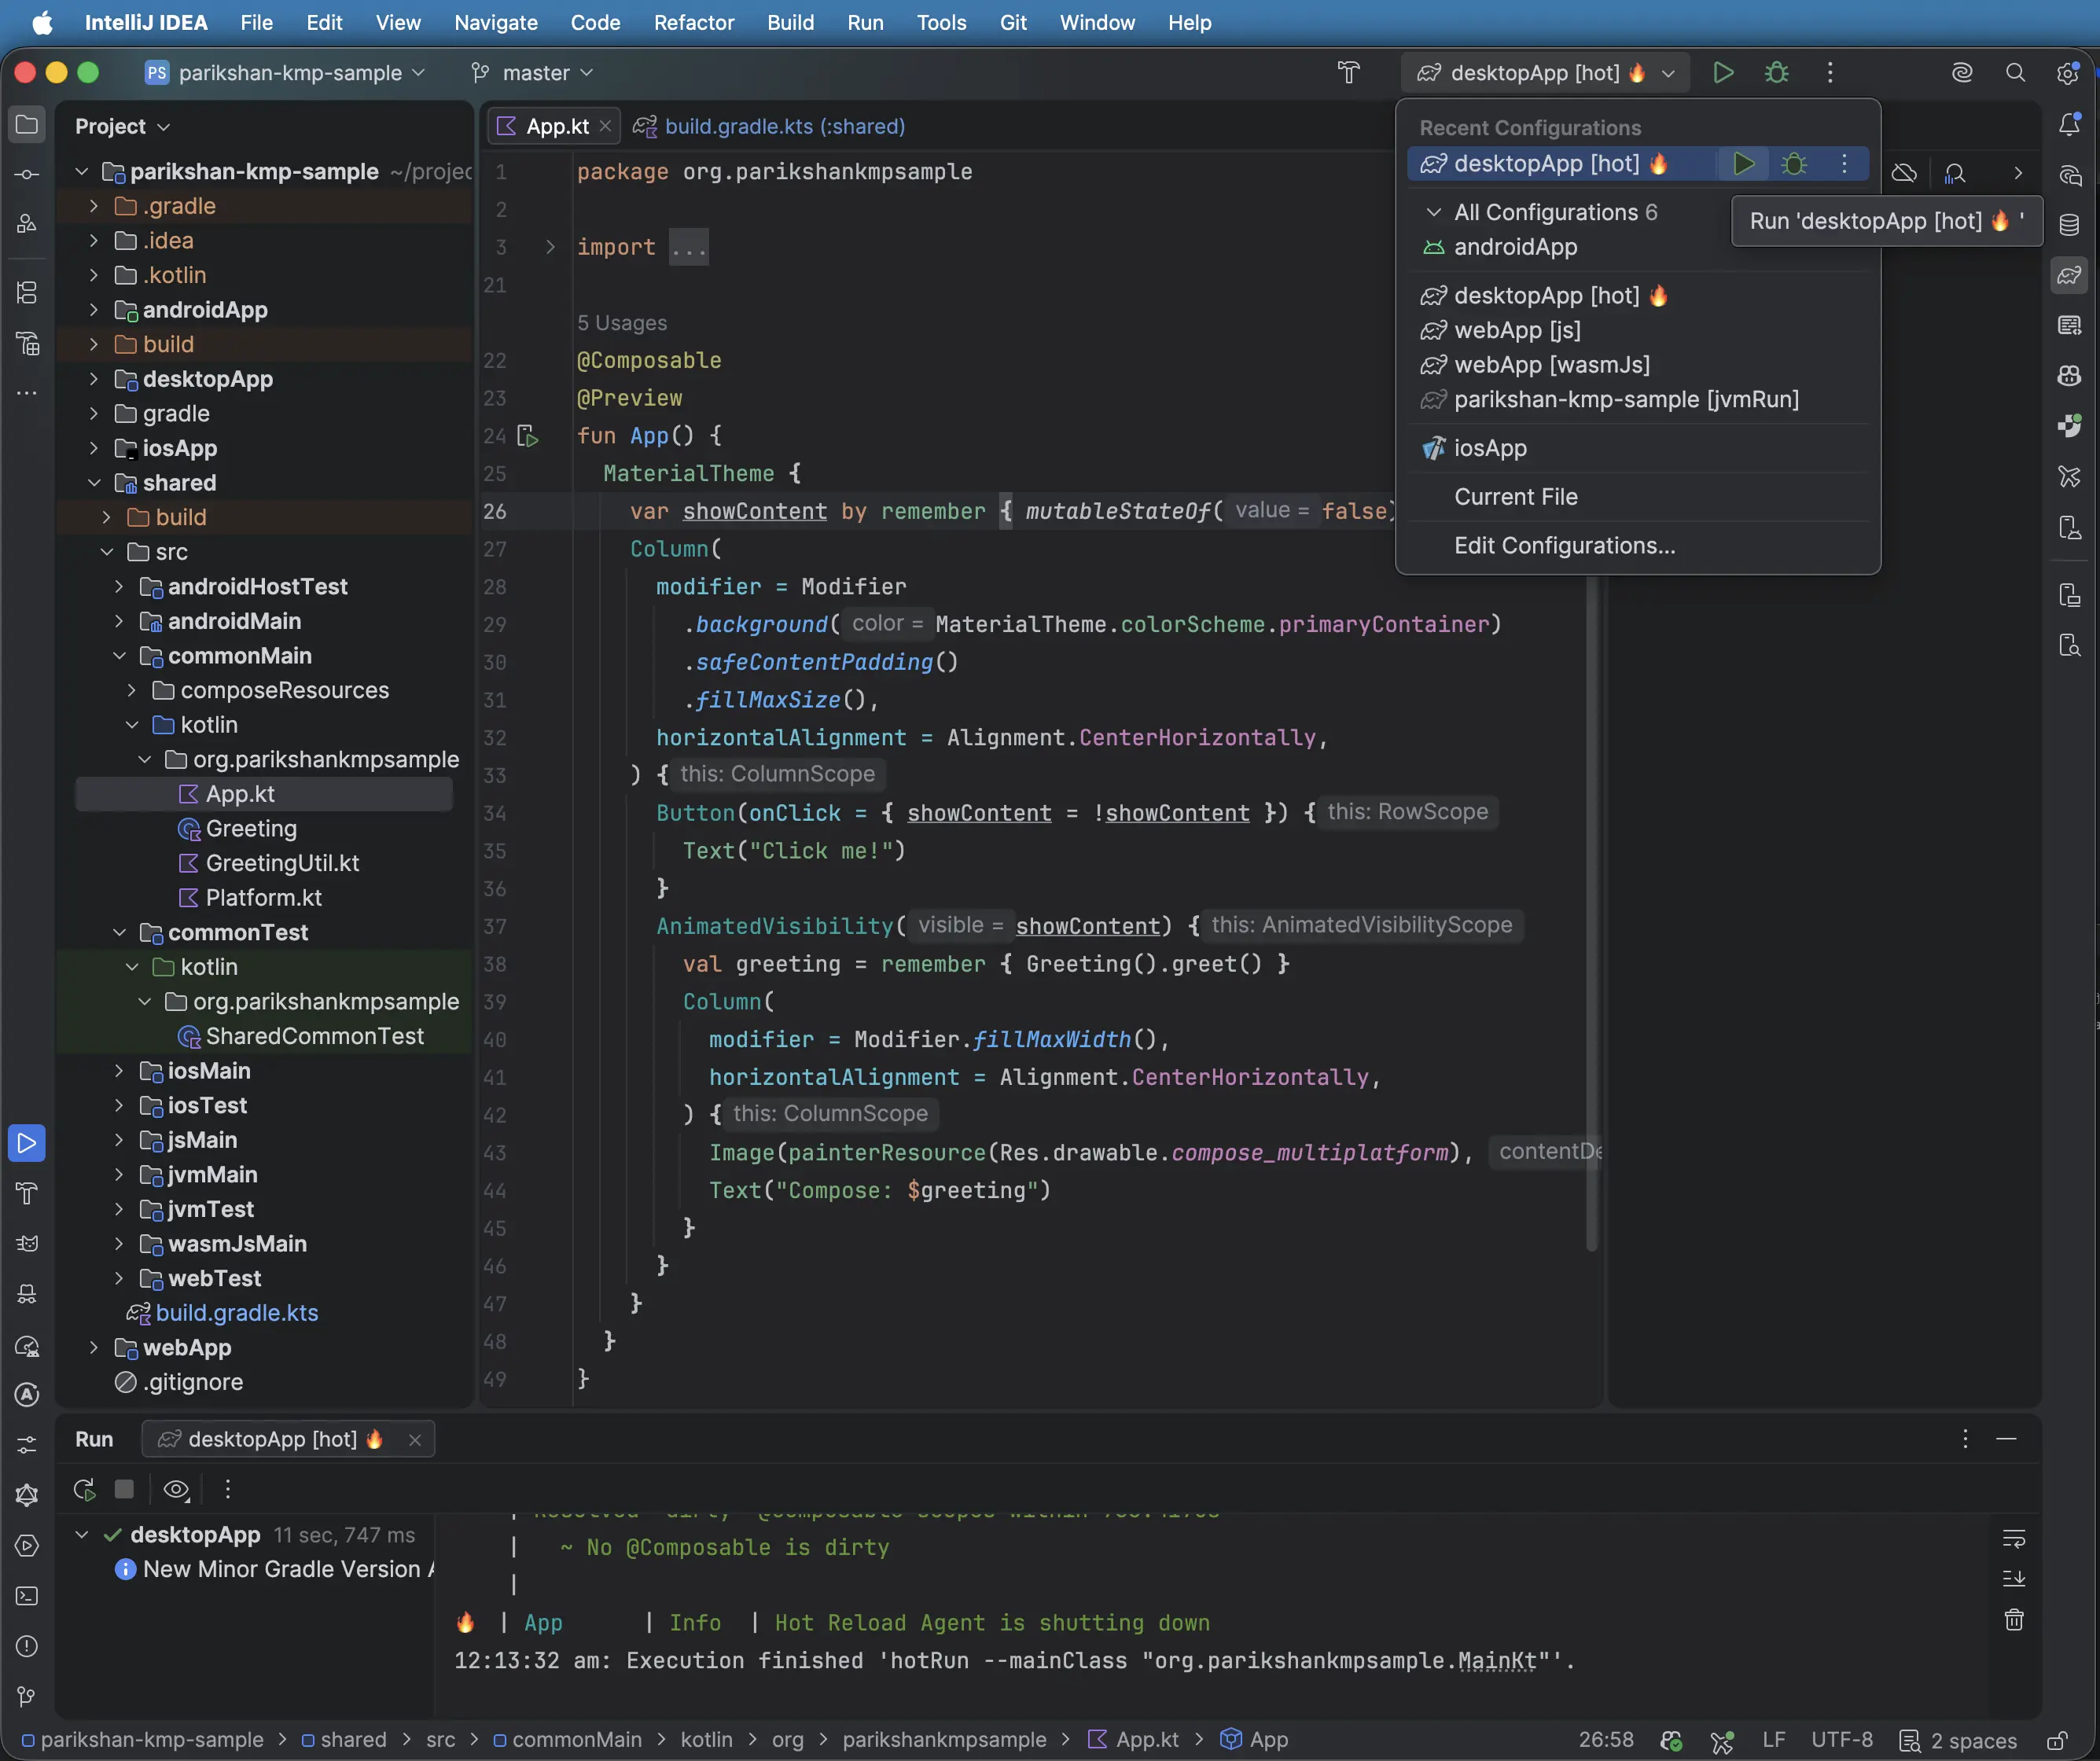
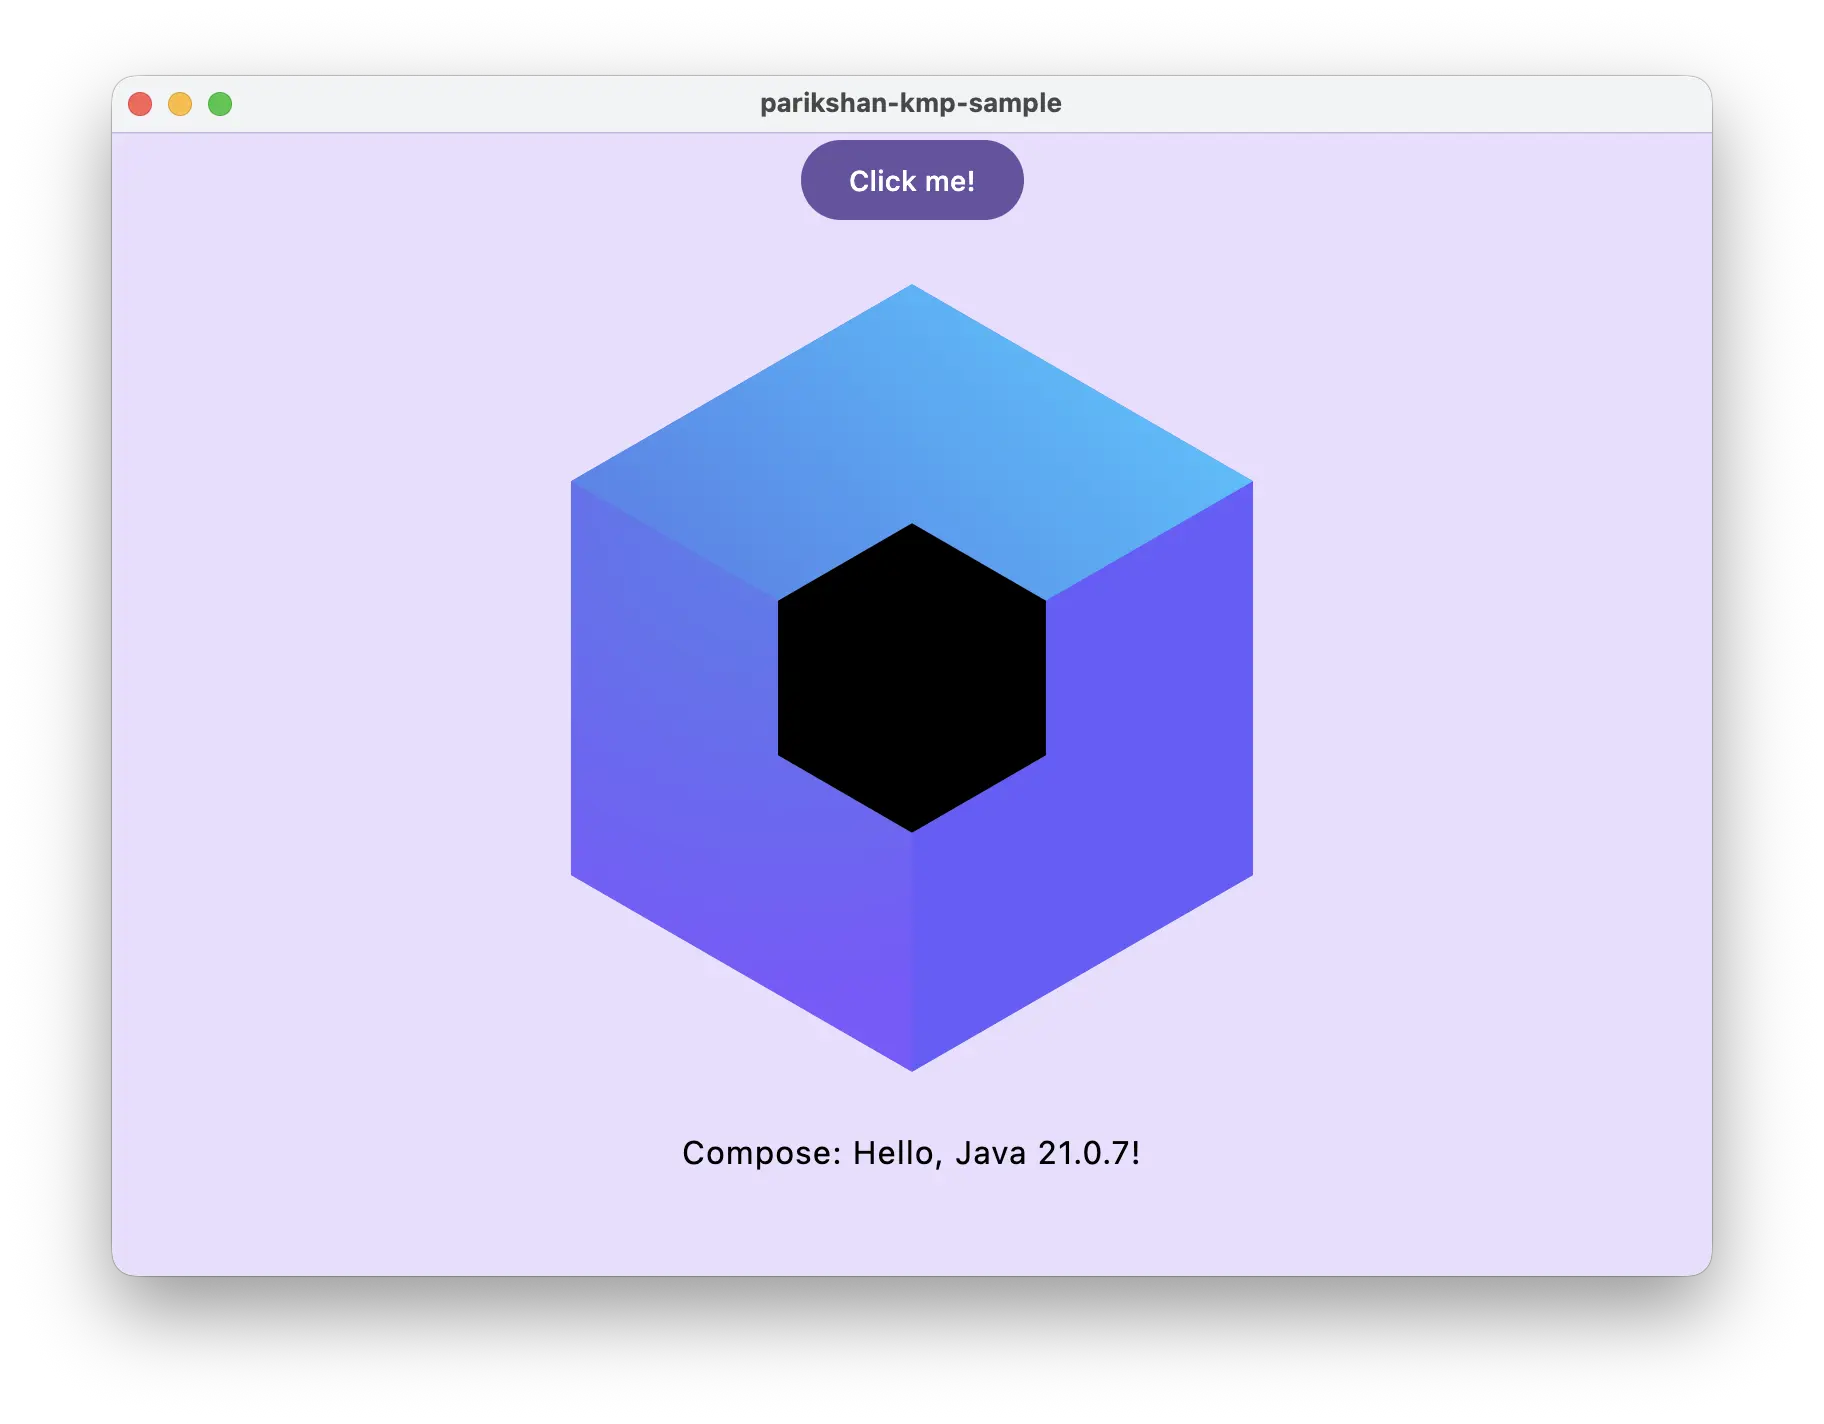
desktopApp run configuration and click Run (▶)2. Apply the Parikshan Gradle Plugin
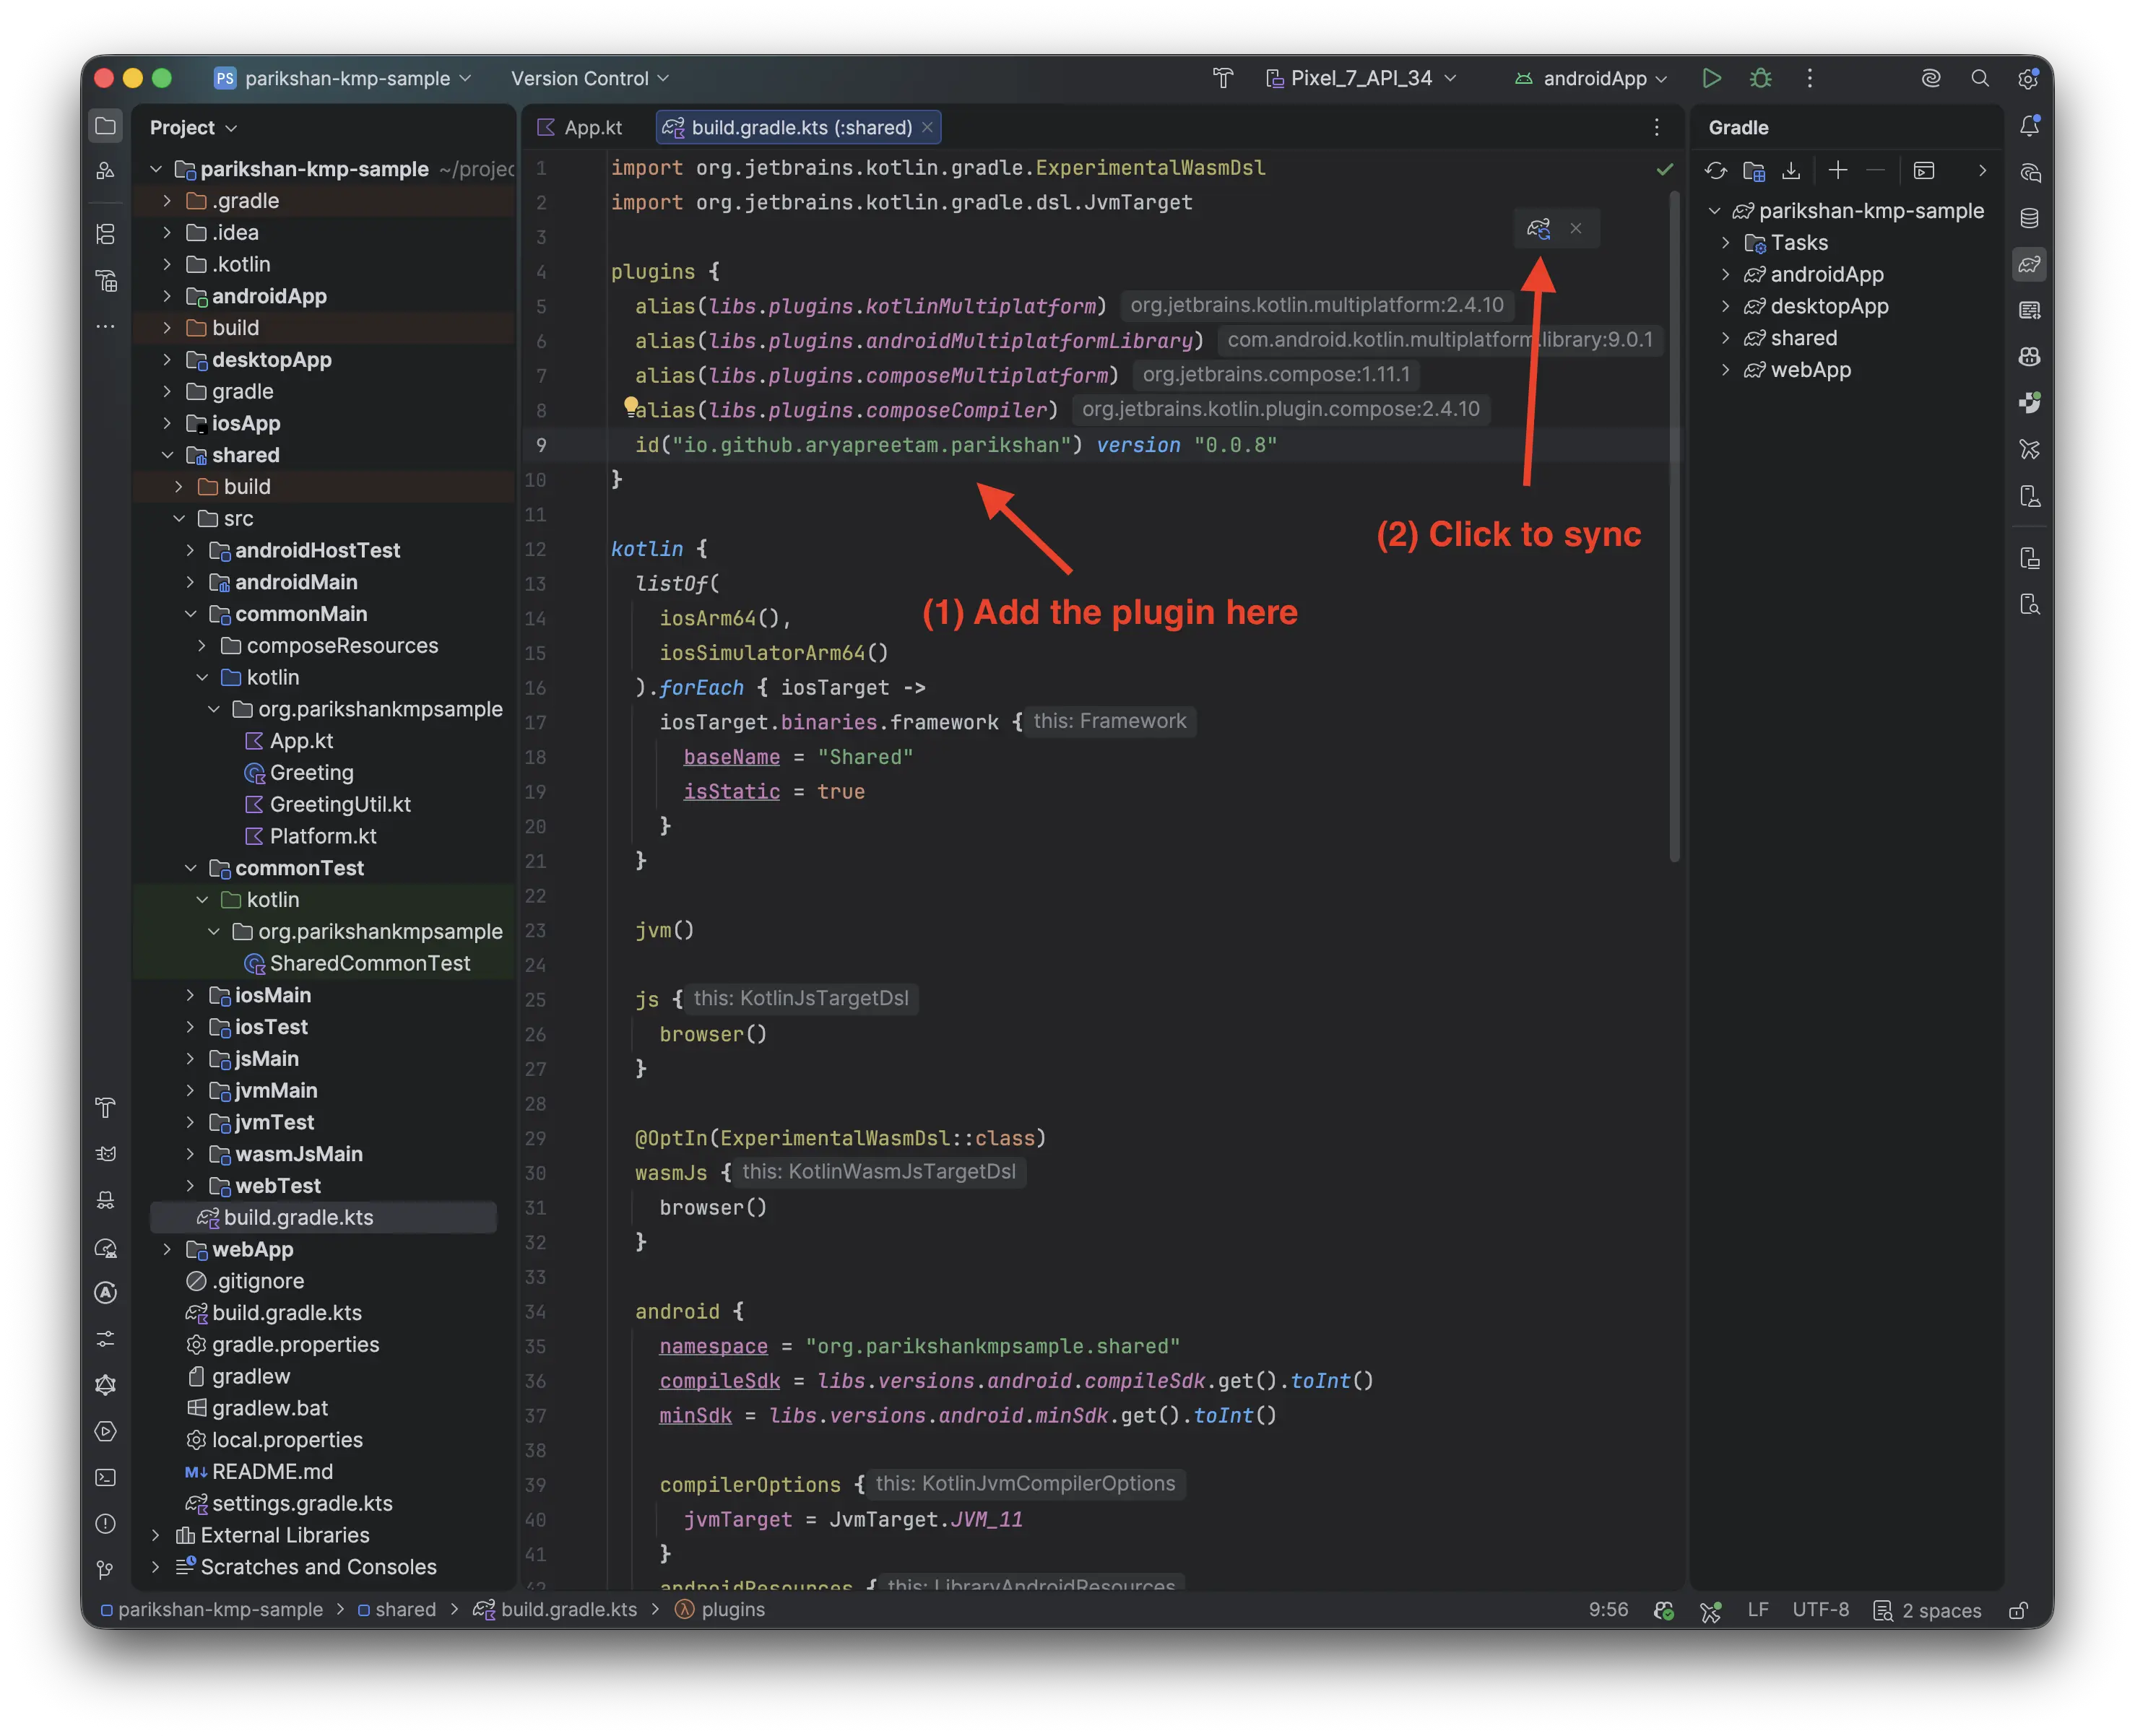
Open shared/build.gradle.kts and add the Parikshan Gradle plugin to your plugins { ... } block:
plugins {
  alias(libs.plugins.kotlinMultiplatform)
  alias(libs.plugins.composeMultiplatform)
  alias(libs.plugins.composeCompiler)
  id("io.github.aryapreetam.parikshan") version "0.0.10" // (1)
}
- Applies the Parikshan Gradle Plugin, which automatically configures common test dependencies and target-specific test execution tasks (
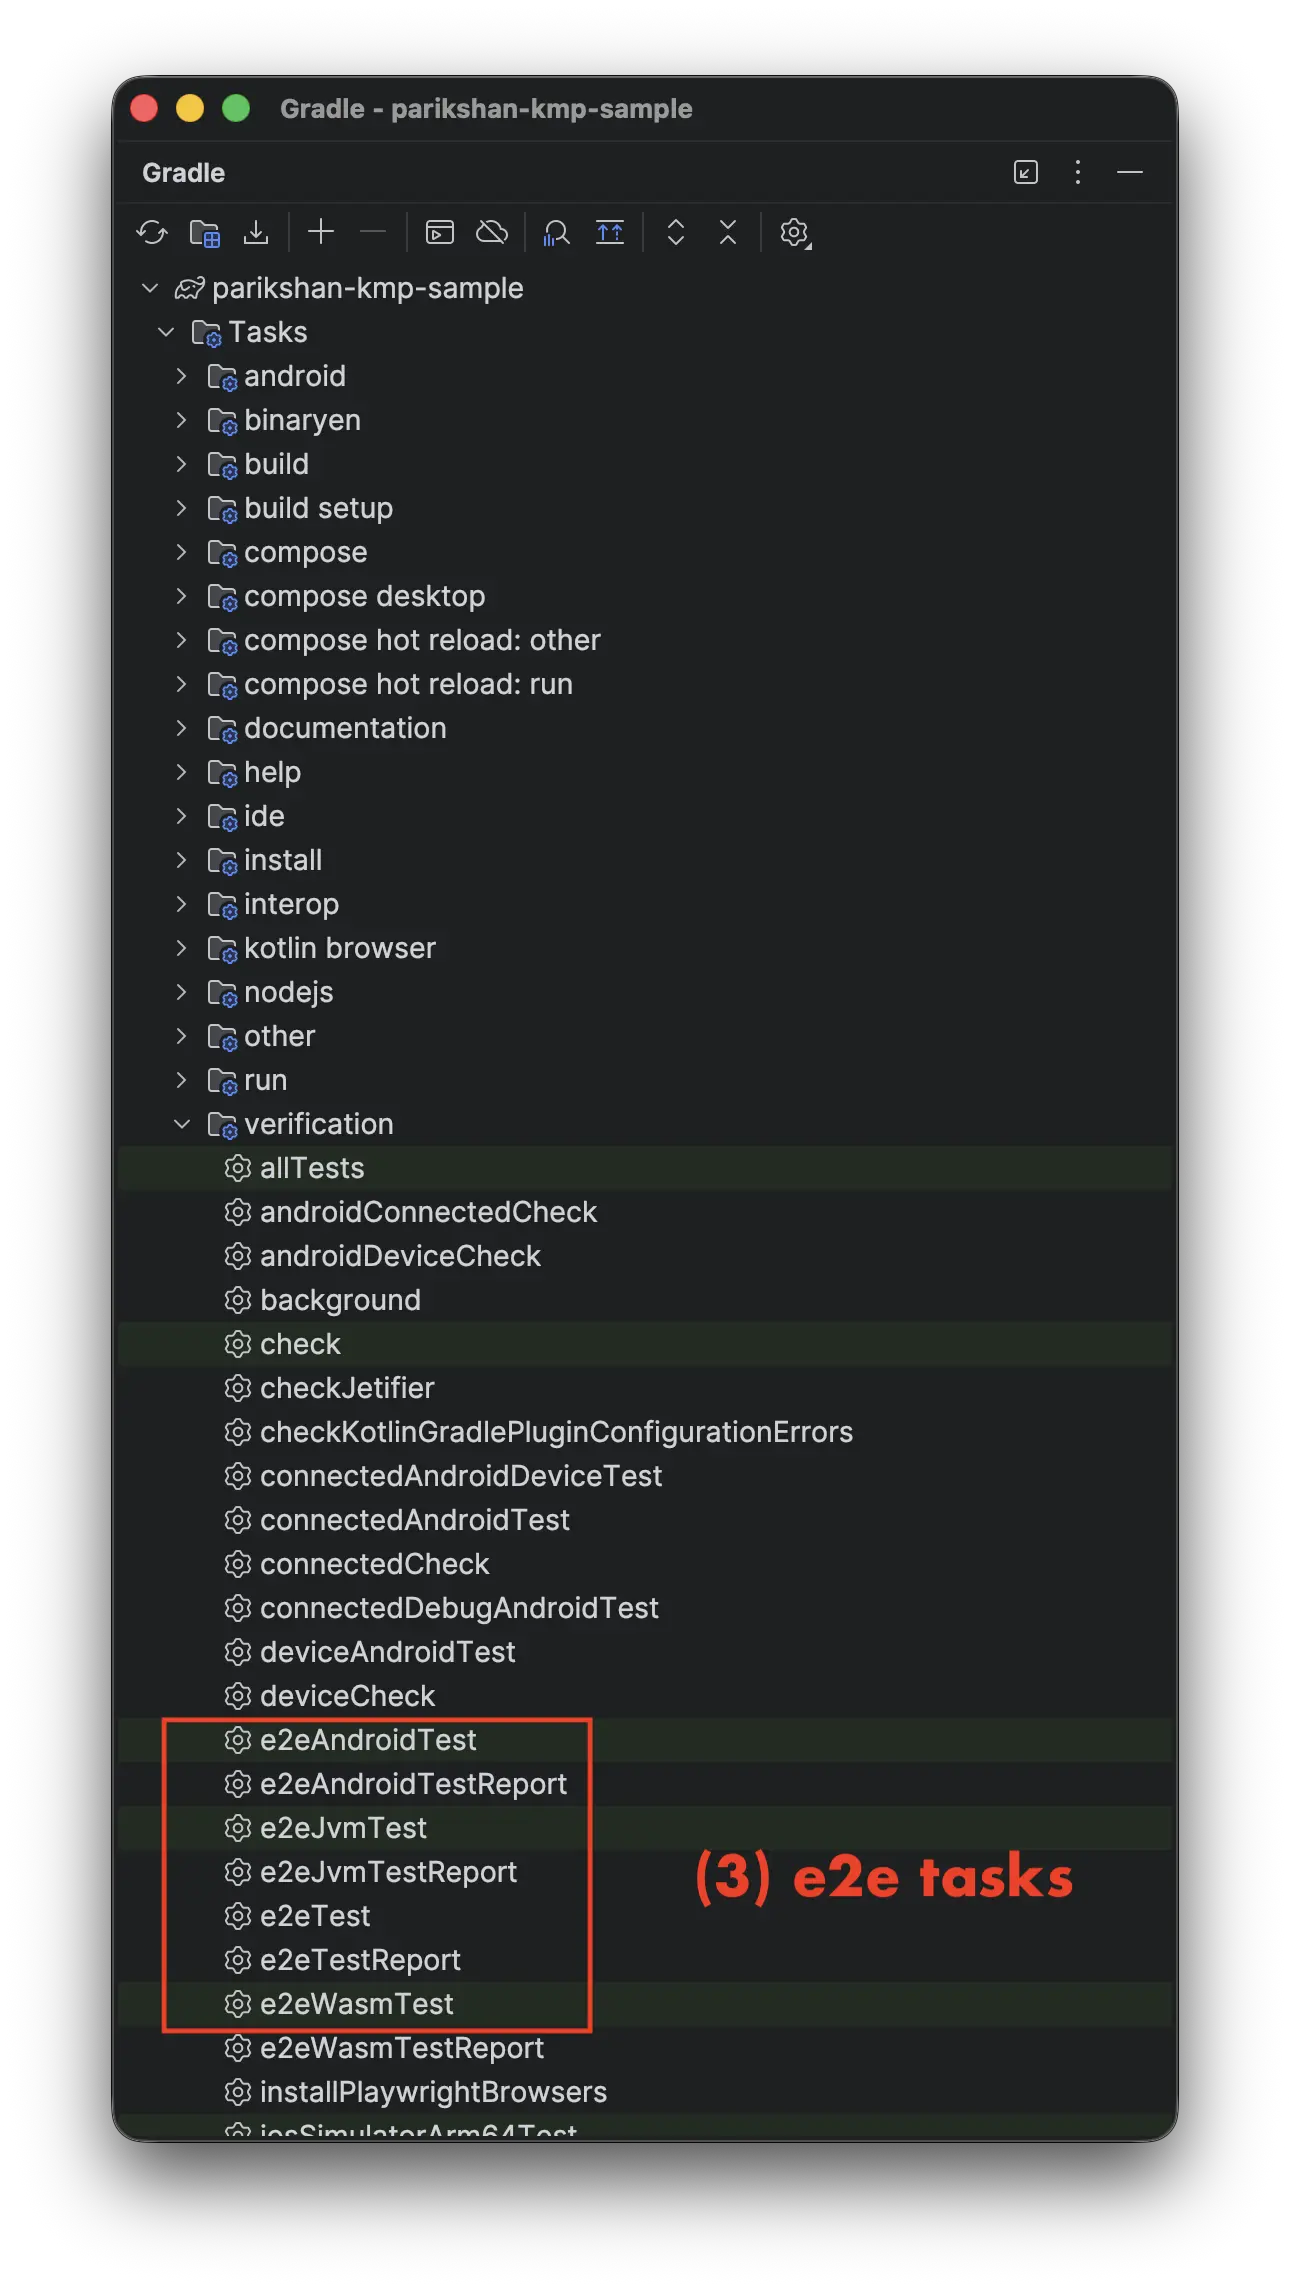
e2eJvmTest,e2eWasmTest,e2eAndroidTest,e2eIosTest, ande2eTest).
Click Sync Now in the top-right notification banner of your IDE to download and resolve dependencies.
Once synced, open the Gradle tool window on the right side of the IDE under Tasks > verification OR shared > Tasks > verification to see all Parikshan e2e* tasks automatically registered:
shared/build.gradle.kts and click Synce2e* tasks registered under verification3. Write Your First E2E Test
With Parikshan, you do not need to modify your existing UI code or add custom test tags to get started. You can test the default template UI directly by matching button text and accessibility semantics.
Create a new Kotlin test class inside commonTest:
shared/src/commonTest/kotlin/org/parikshankmpsample/AppTest.kt
package org.parikshankmpsample

import io.github.aryapreetam.parikshan.e2eTest
import kotlin.test.Test

class AppTest {

  @Test
  fun testDefaultApp() = e2eTest {
    // ensure 'Compose' is not visible before clicking the button
    assertNotVisible("Compose")  // (1)
    // click the button

    click("Click me!")           // (2)
    // check if 'Compose' is visible
    assertVisible("Compose")     // (3)
  }
}
assertNotVisible("Compose"): Asserts that the dynamic greeting text containing"Compose"is not rendered in the UI tree before the button click.click("Click me!"): Finds the Composable button containing the text"Click me!"and simulates a click.assertVisible("Compose"): Asserts that the dynamic greeting text containing"Compose"is rendered in the UI tree.
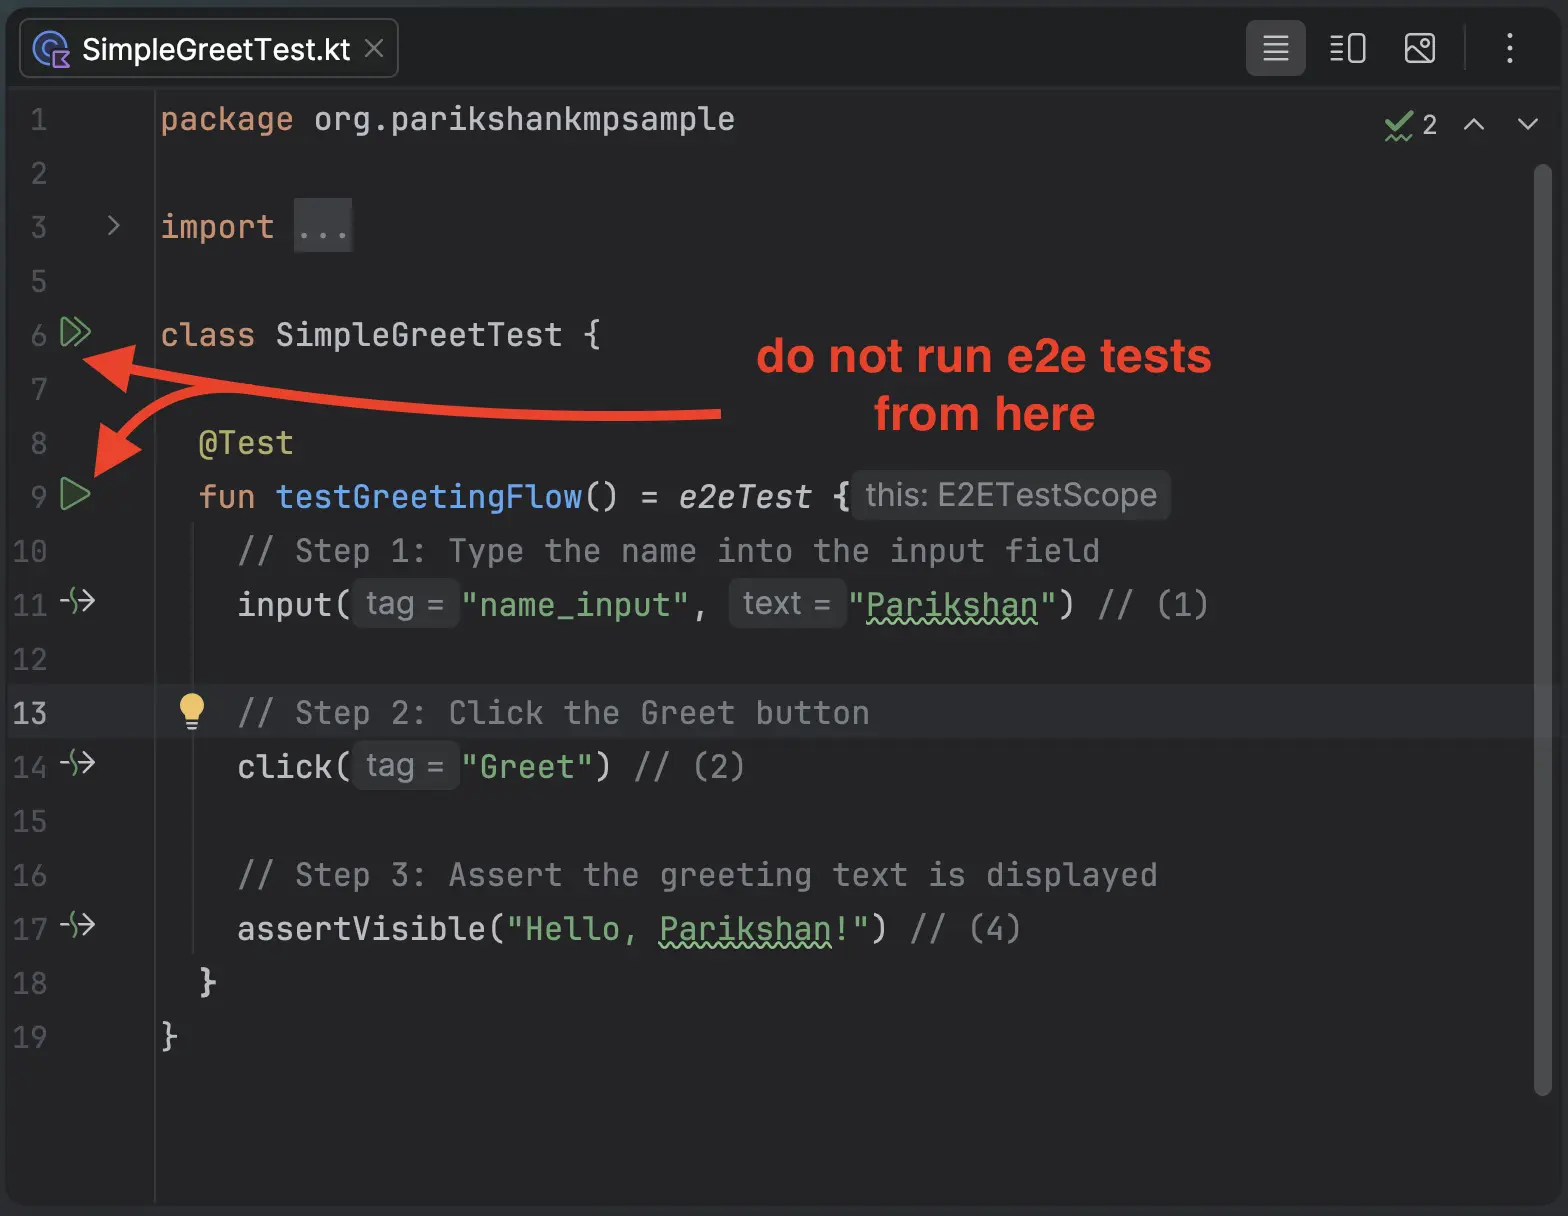
Do Not Run Tests via IDE Gutter Icons
Running tests directly via the green gutter play icon (▶) next to @Test or class declarations in IntelliJ IDEA / Android Studio is not currently supported for Parikshan host-driven tests. Gutter icon execution will be enabled once the dedicated Parikshan IDE plugin is released.
Recommended execution methods:
- From Terminal (Recommended): Run
./gradlew :shared:e2eJvmTestor./gradlew :shared:e2eTest(offers full CLI options, filters, and device flags). - From Gradle Tool Window: Open the Gradle tool window on the right, navigate to
shared > Tasks > verification, and double-clicke2eJvmTest.
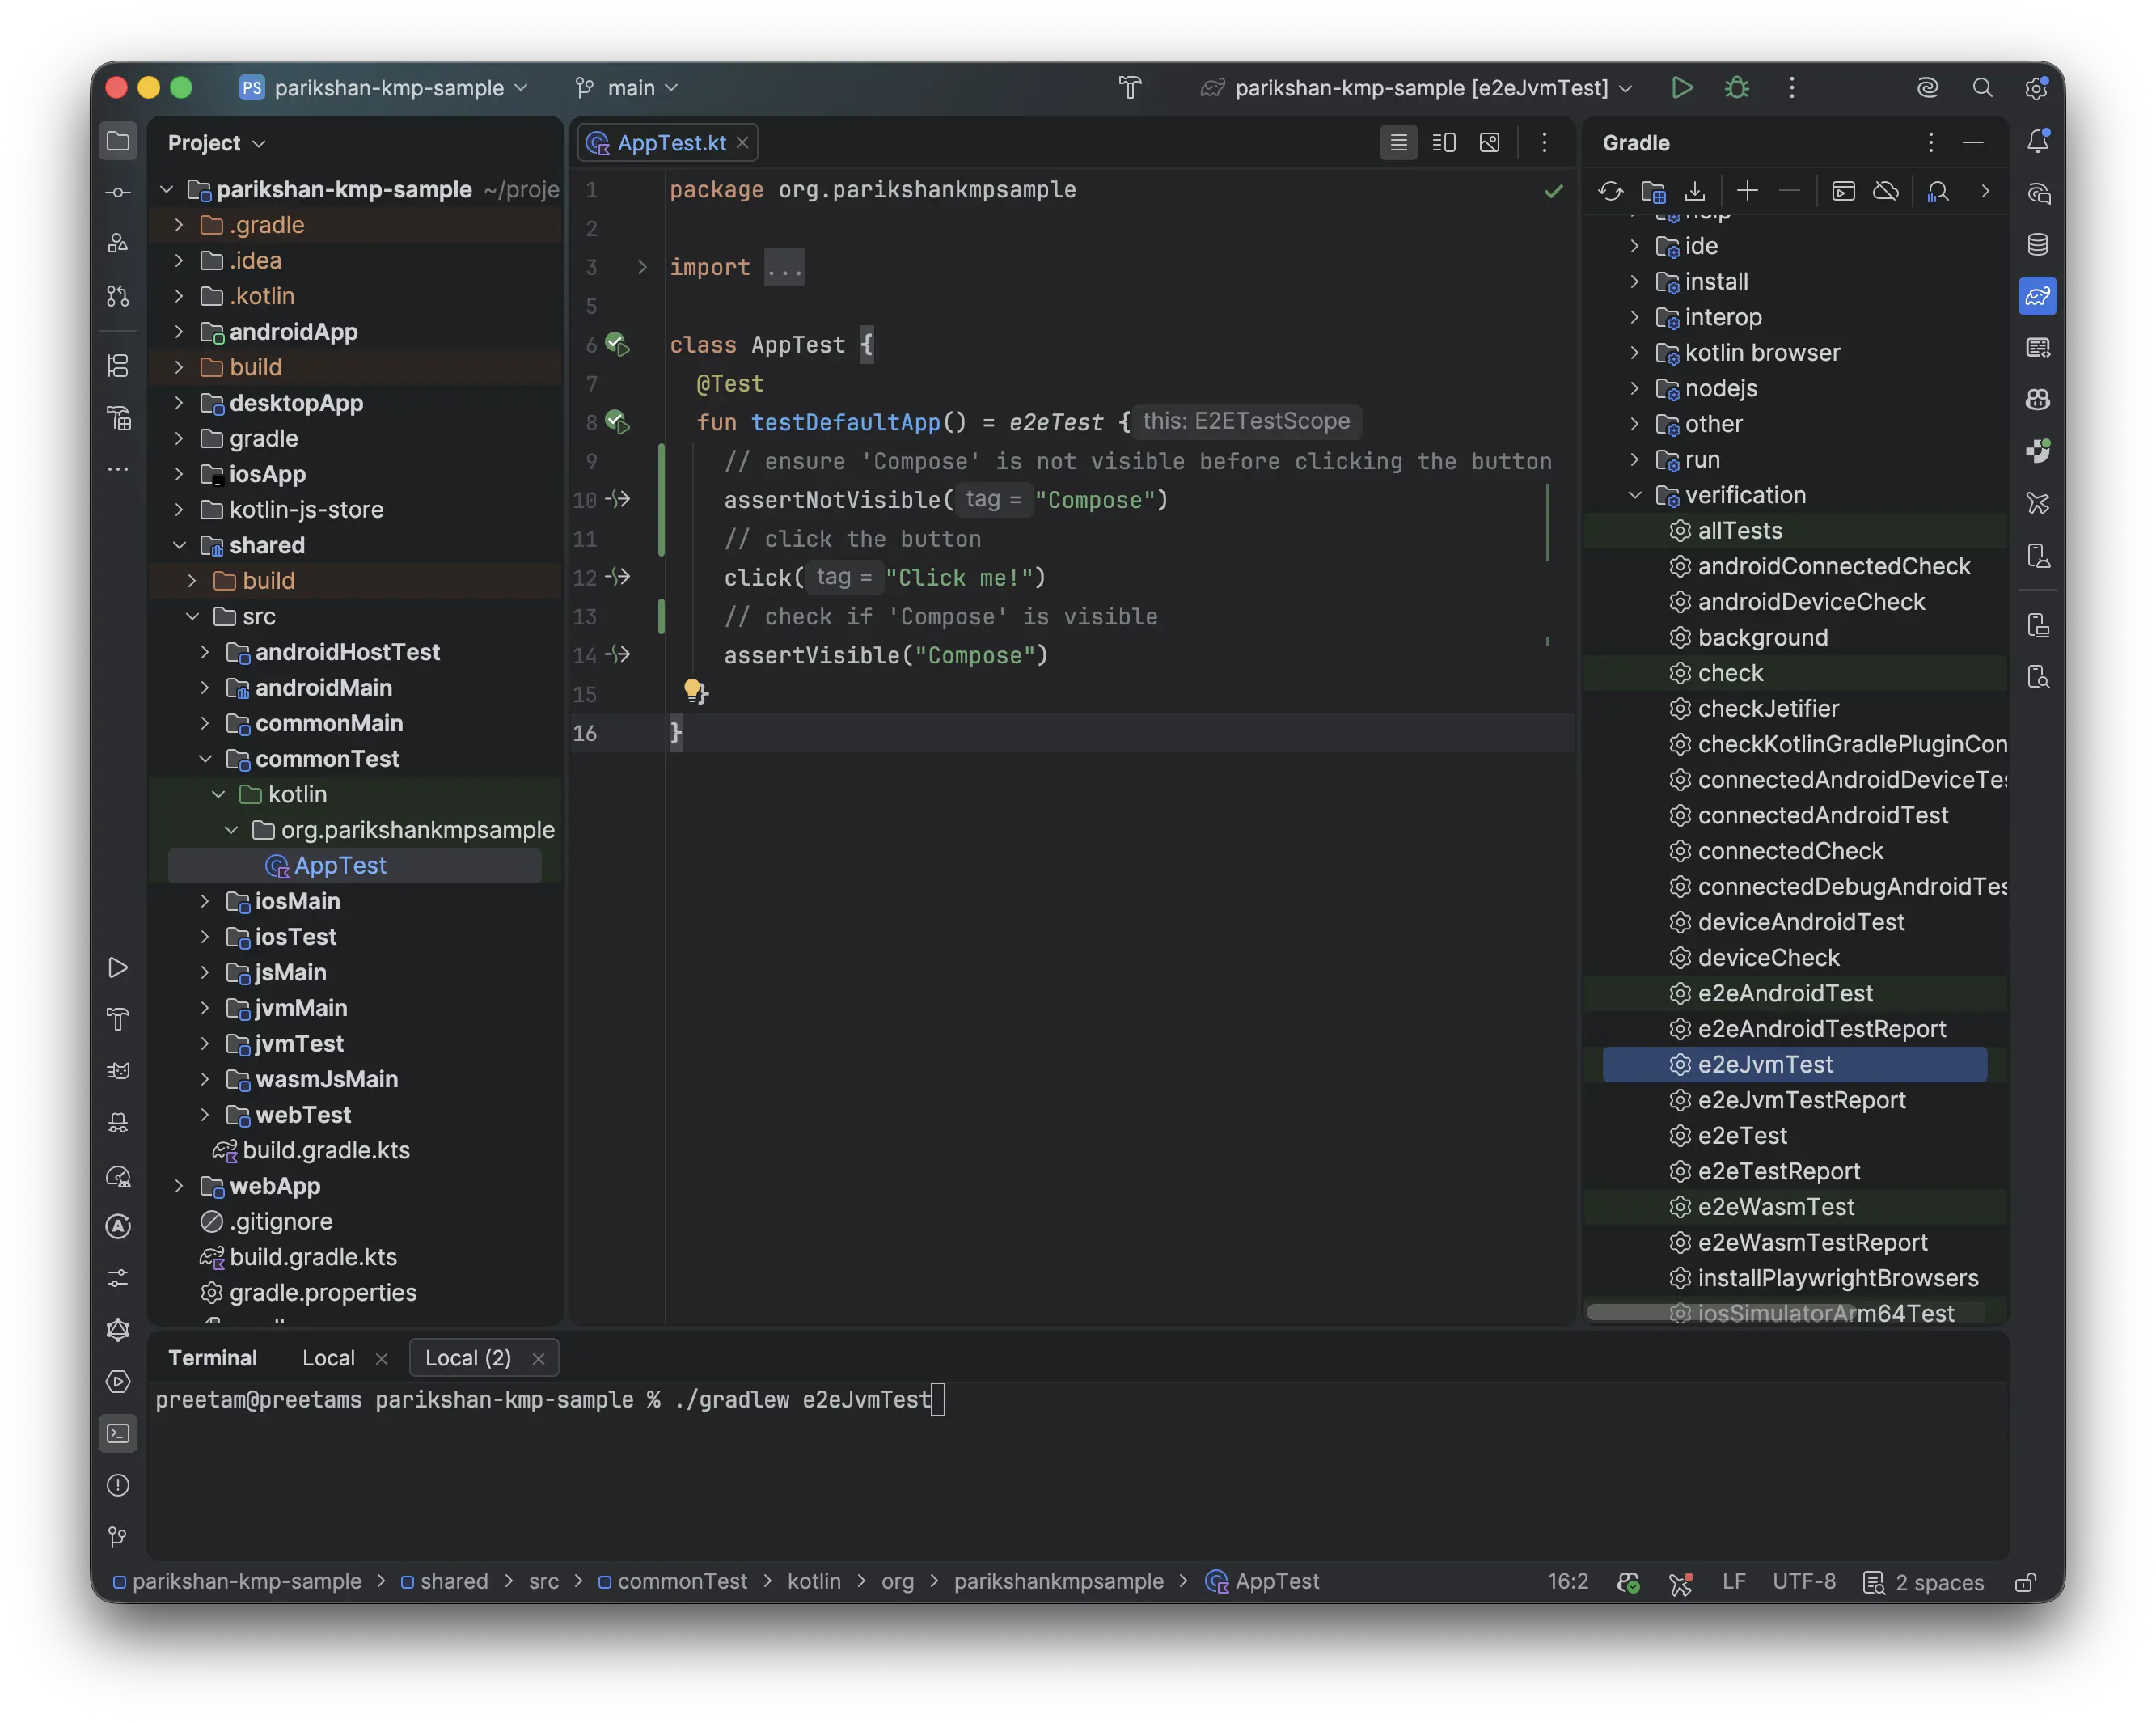
You can run your test on Desktop JVM in either of the following ways:
- From Terminal (Recommended): Run:
- From Gradle Tool Window: Open the Gradle tool window on the right, navigate to
shared > Tasks > verification(orTasks > verification), and double-clicke2eJvmTest.
AppTest.kt open in IDE4. Run Across Targets
You can execute the exact same test suite across all configured target platforms concurrently:
- From IDE: Open the Gradle tool window under
shared > Tasks > verification(orTasks > verification), double-clicke2eTest(or right-click → Run). - From Terminal: Run:
Terminal Customization
We recommend running tests from the terminal as it provides powerful CLI customization options:
- Filter specific test classes or methods:
- Select specific target platforms:
- Target individual platforms directly:
5. Next Steps: Testing Forms & User Inputs
Now that you have your first test running, learn how to handle text inputs, keyboard events, and custom Modifier.testTag identifiers when building forms:
→ Continue to Testing Forms & User Inputs.