Your First Test (Standalone Android)
This step-by-step guide walks through configuring and running your first automated E2E test in a standalone Android Jetpack Compose project (without Kotlin Multiplatform) with zero modifications to your UI code.
Building a Compose Multiplatform (KMP) app instead? See Your First KMP Test.
Prefer cloning a working project? Clone the starter template: github.com/aryapreetam/parikshan-android-sample
(Or explore the in-repo standalone-android sample).
0. Prerequisites
Ensure your environment meets the following requirements:
- Android Studio: Android Studio Ladybug (2024.2+) or newer.
- JDK: Version 21 or newer (
java -version). - Android Device / Emulator: API Level 24+ running with ADB debugging enabled (
adb devices).
1. Create or Open an Android Project
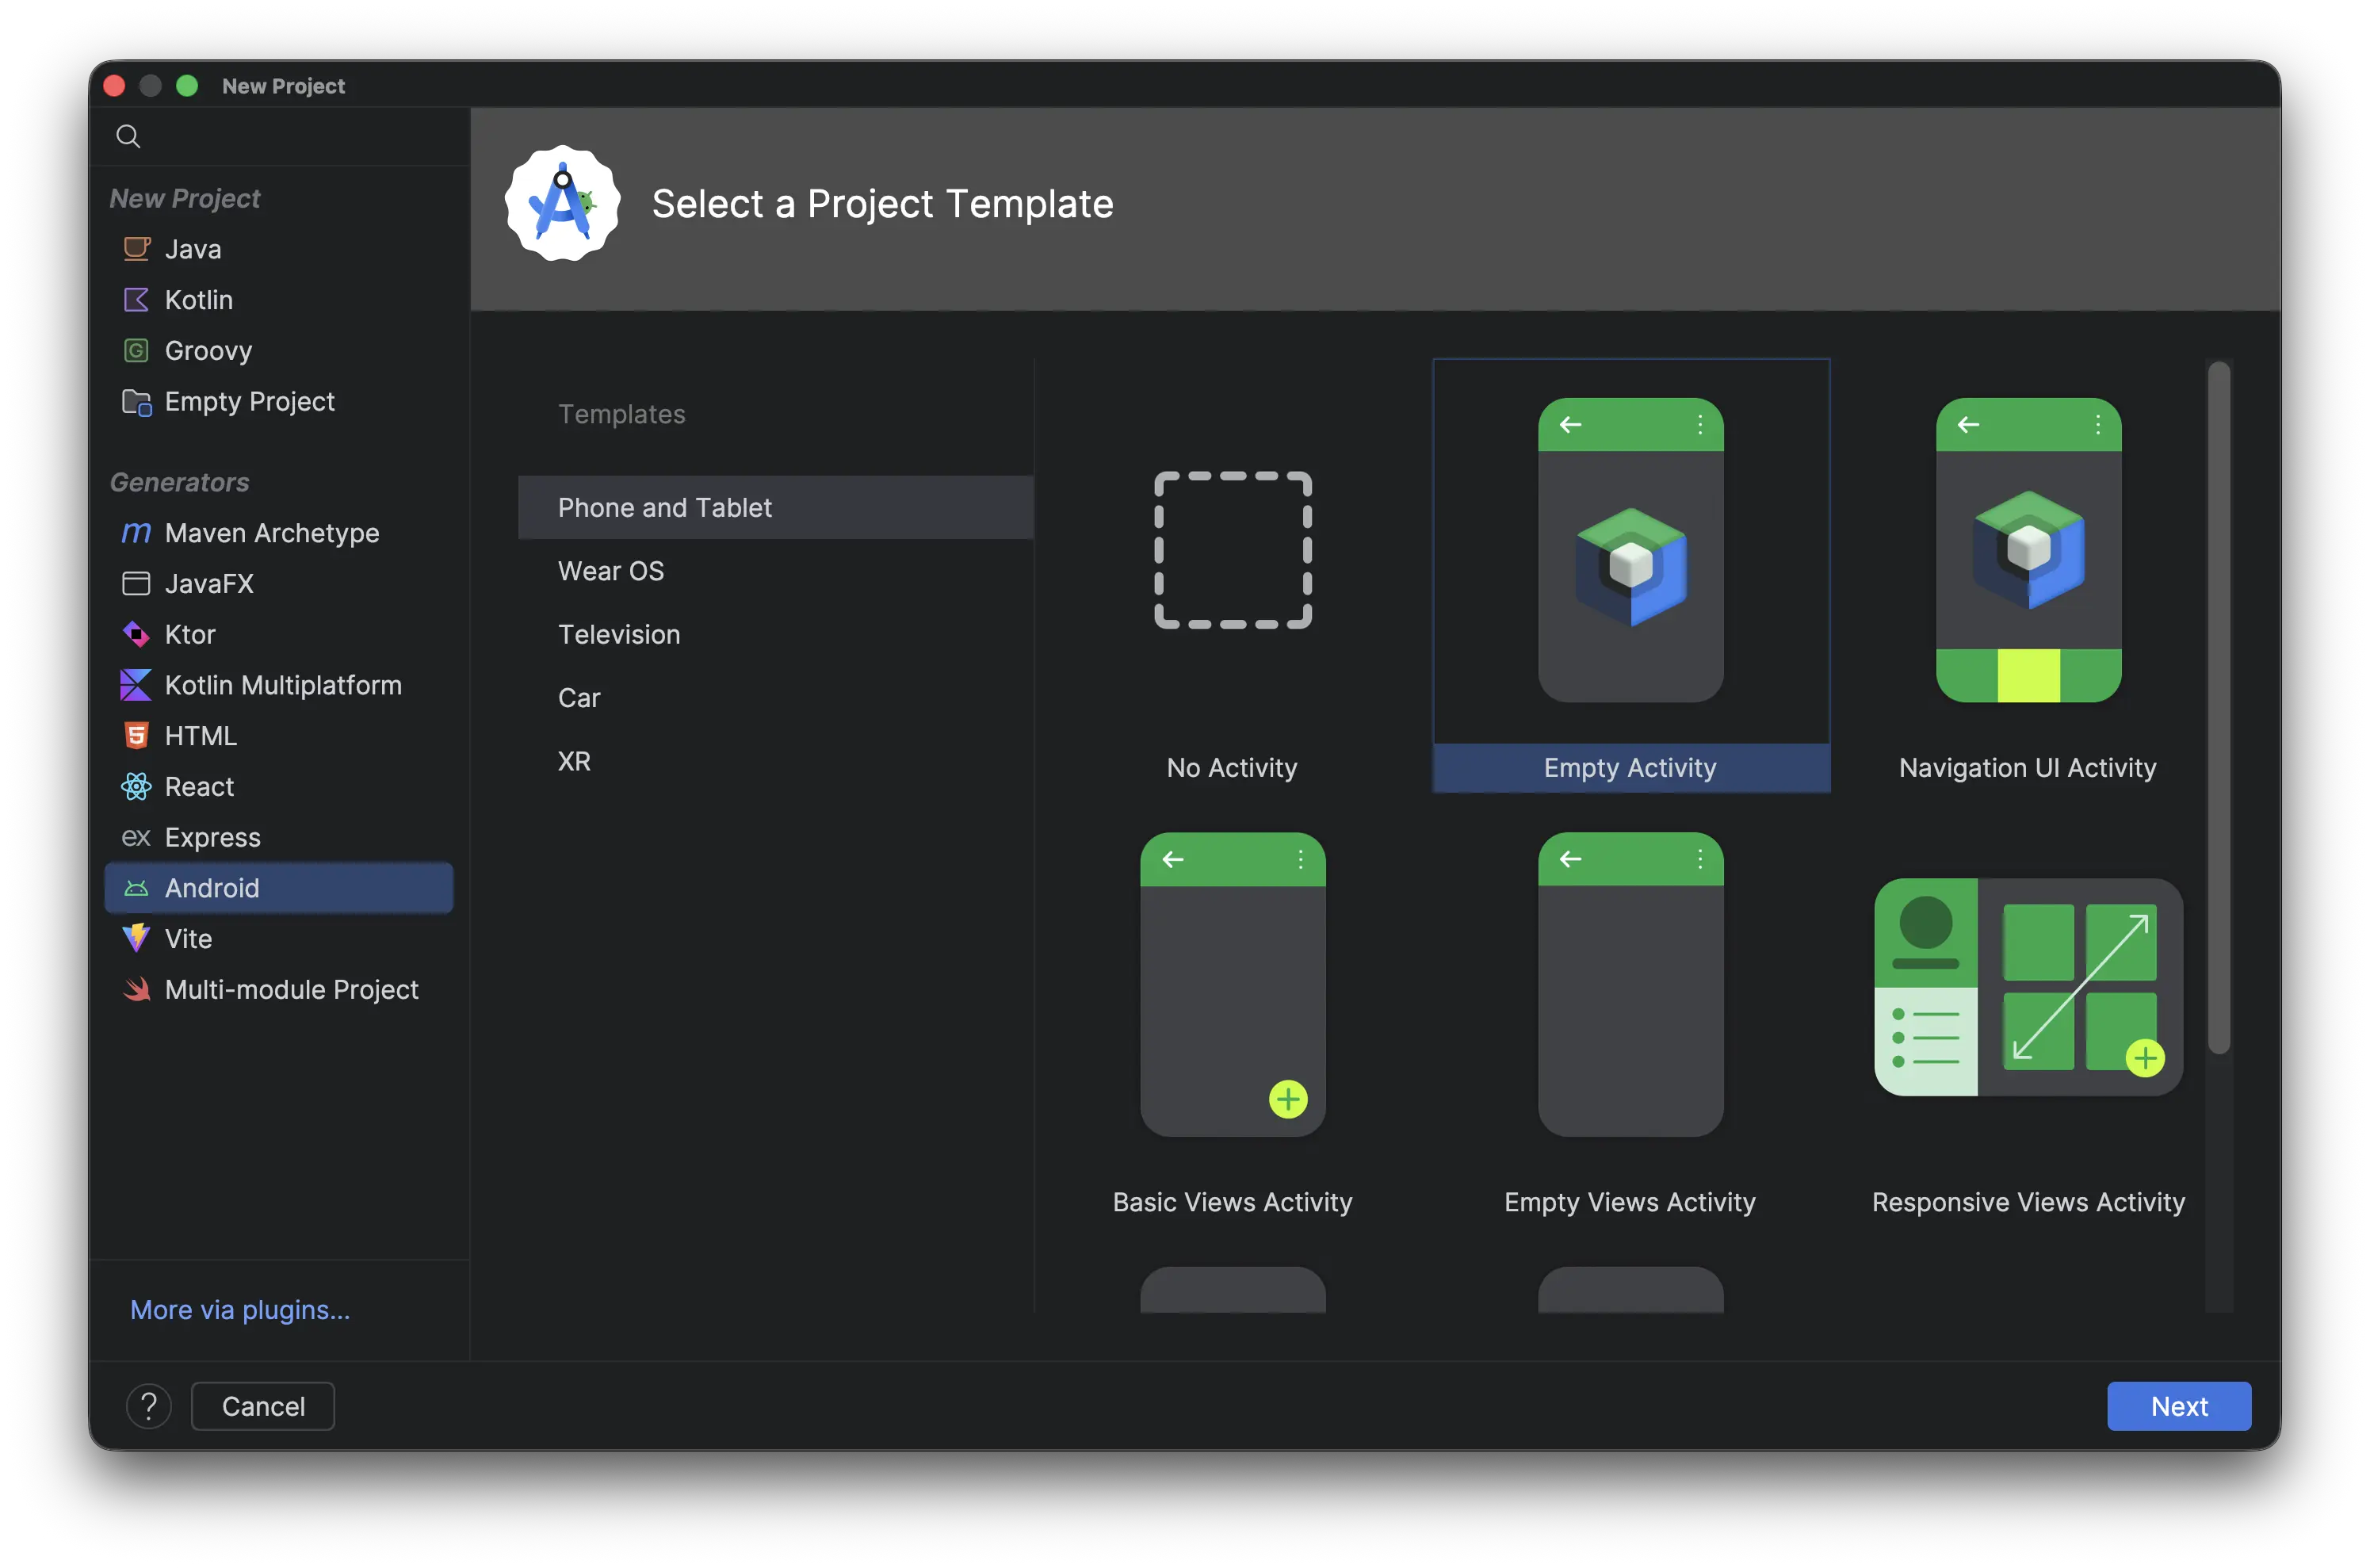
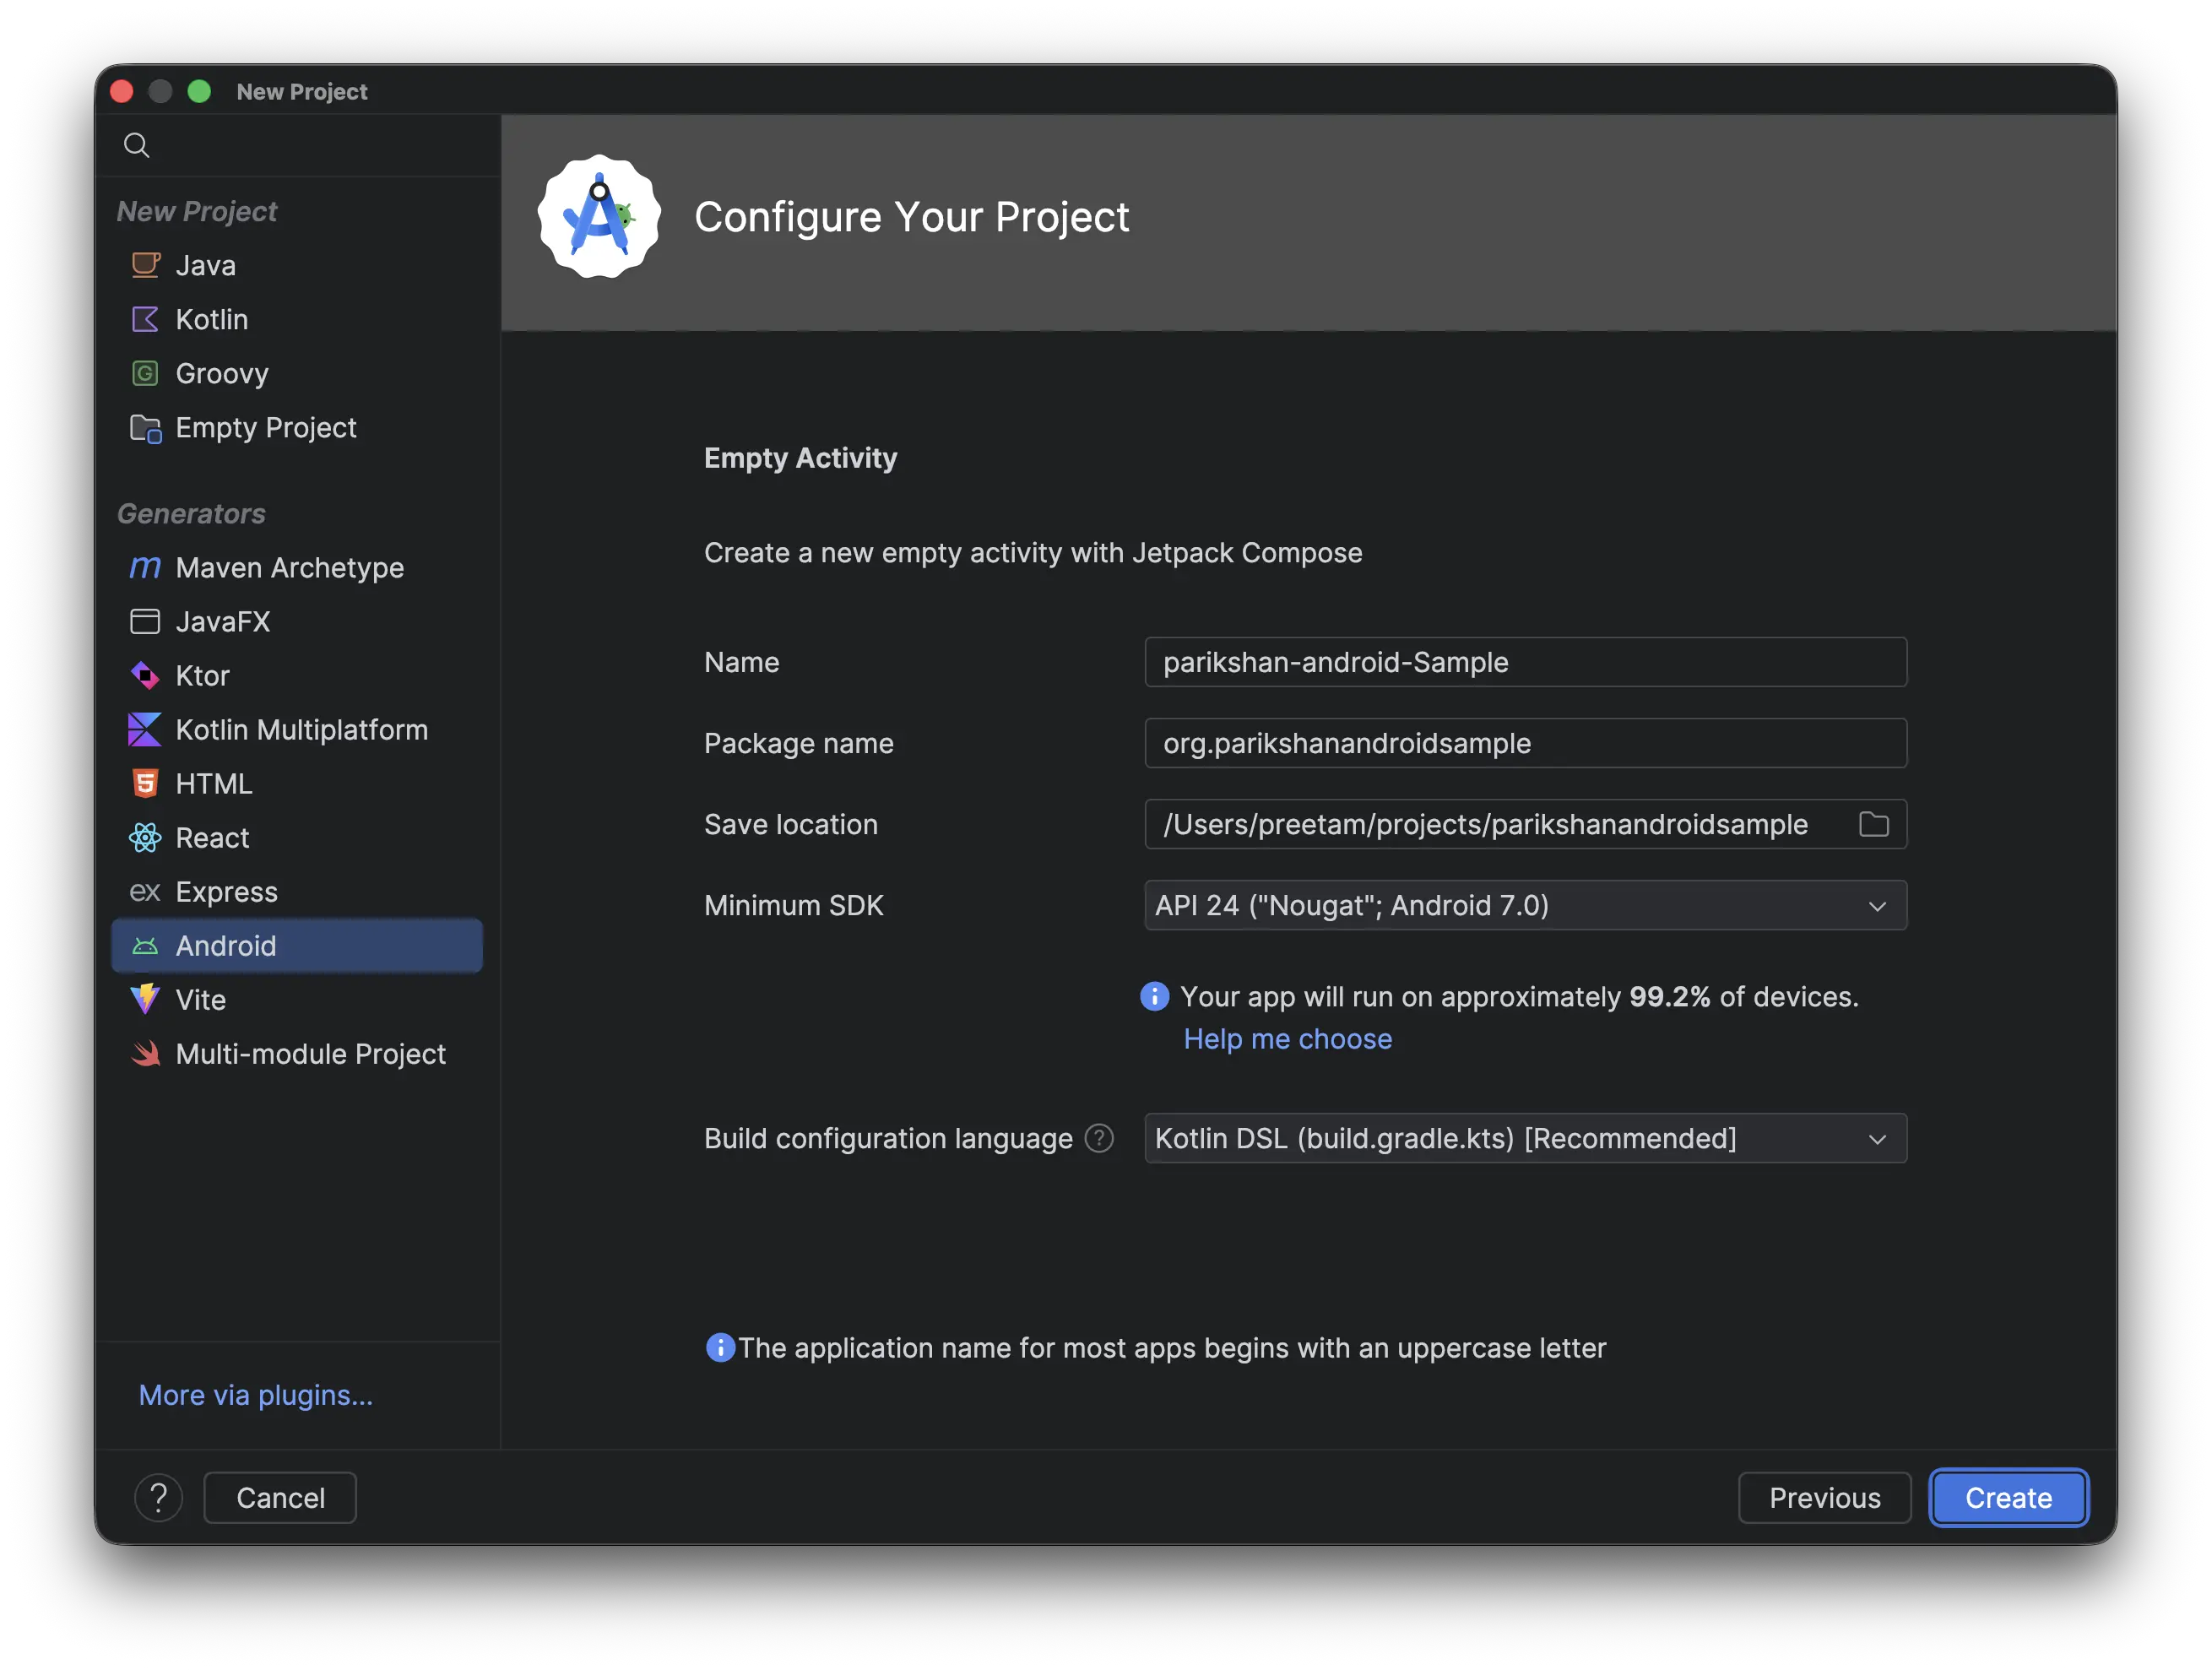
Create a new Android project in Android Studio using the standard Empty Activity template (Jetpack Compose).
Project Configuration Settings
- Name:
parikshanandroidsample - Package name:
org.parikshanandroidsample - Build configuration language:
Kotlin DSL (build.gradle.kts) - Minimum SDK:
API 24 ("Nougat"; Android 7.0)or higher
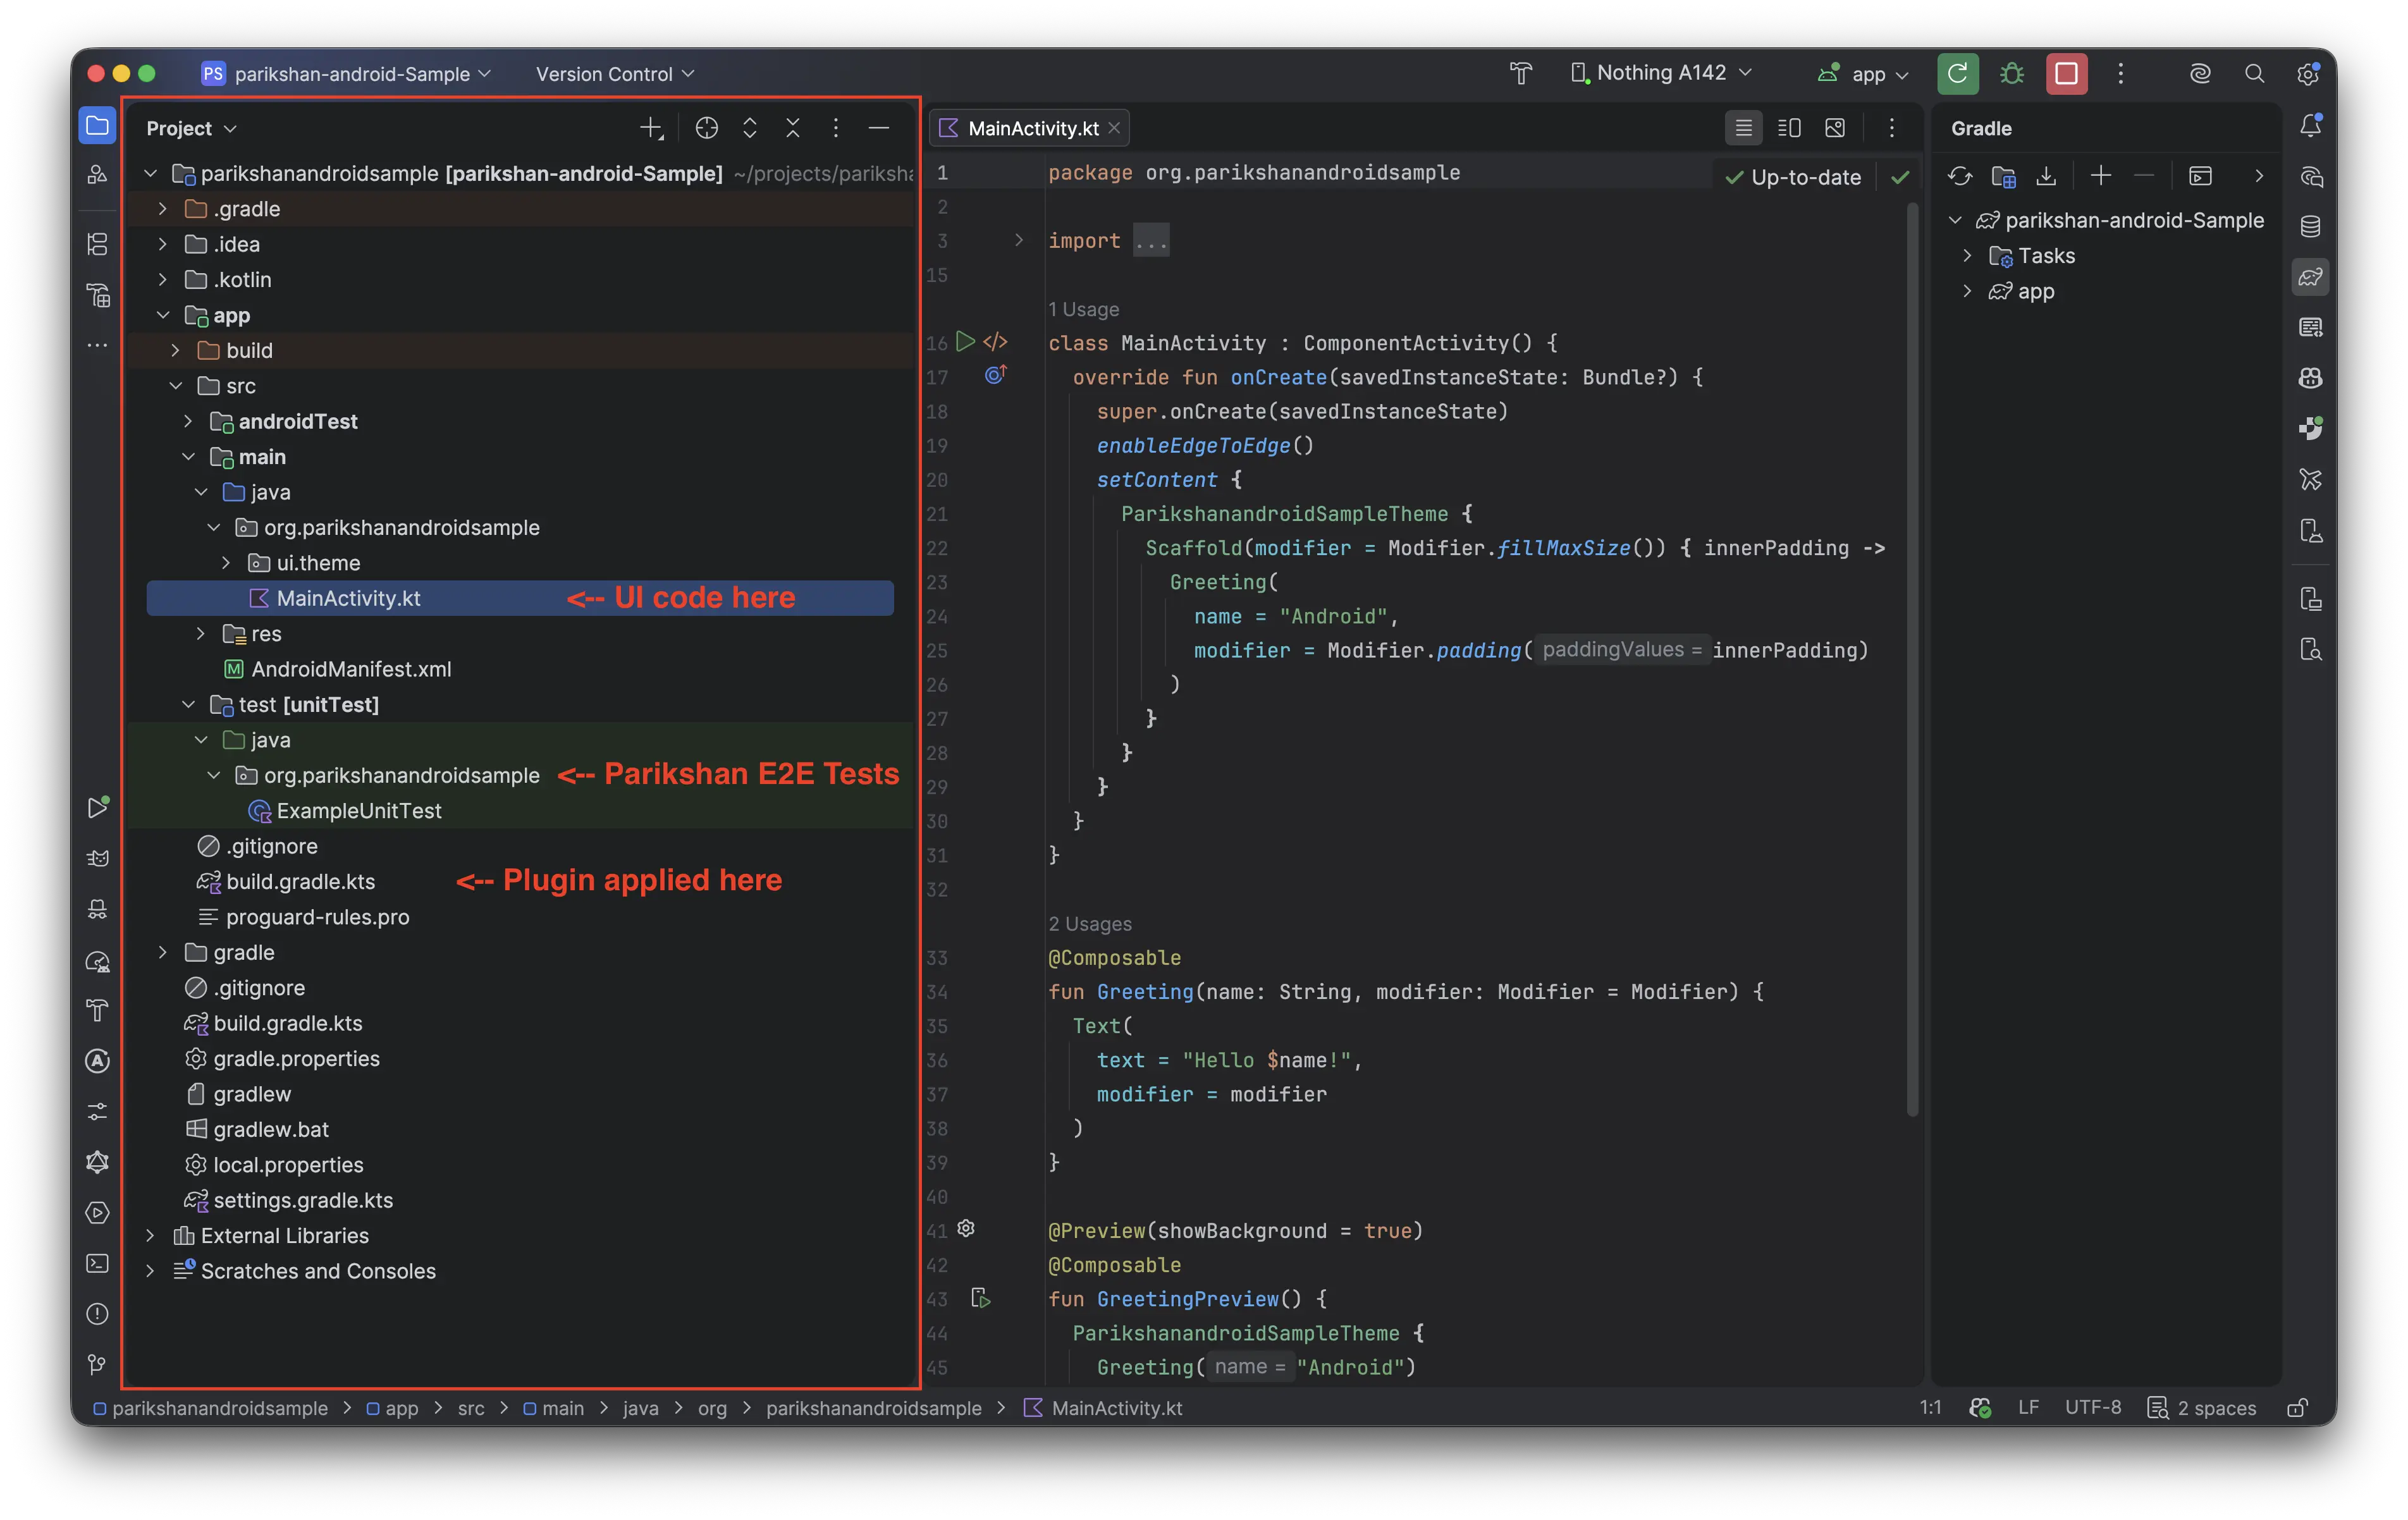
Directory Structure
In a single-module Android project, your source files and tests reside under :app:
parikshanandroidsample/
├── app/
│   ├── src/
│   │   ├── main/java/org/parikshanandroidsample/
│   │   │   └── MainActivity.kt                    <-- Your Composable UI
│   │   └── test/java/org/parikshanandroidsample/
│   │       └── SimpleGreetTest.kt                 <-- Your Parikshan E2E Test
│   └── build.gradle.kts                           <-- Plugin applied here
├── gradle/
├── build.gradle.kts
├── settings.gradle.kts
└── gradle.properties

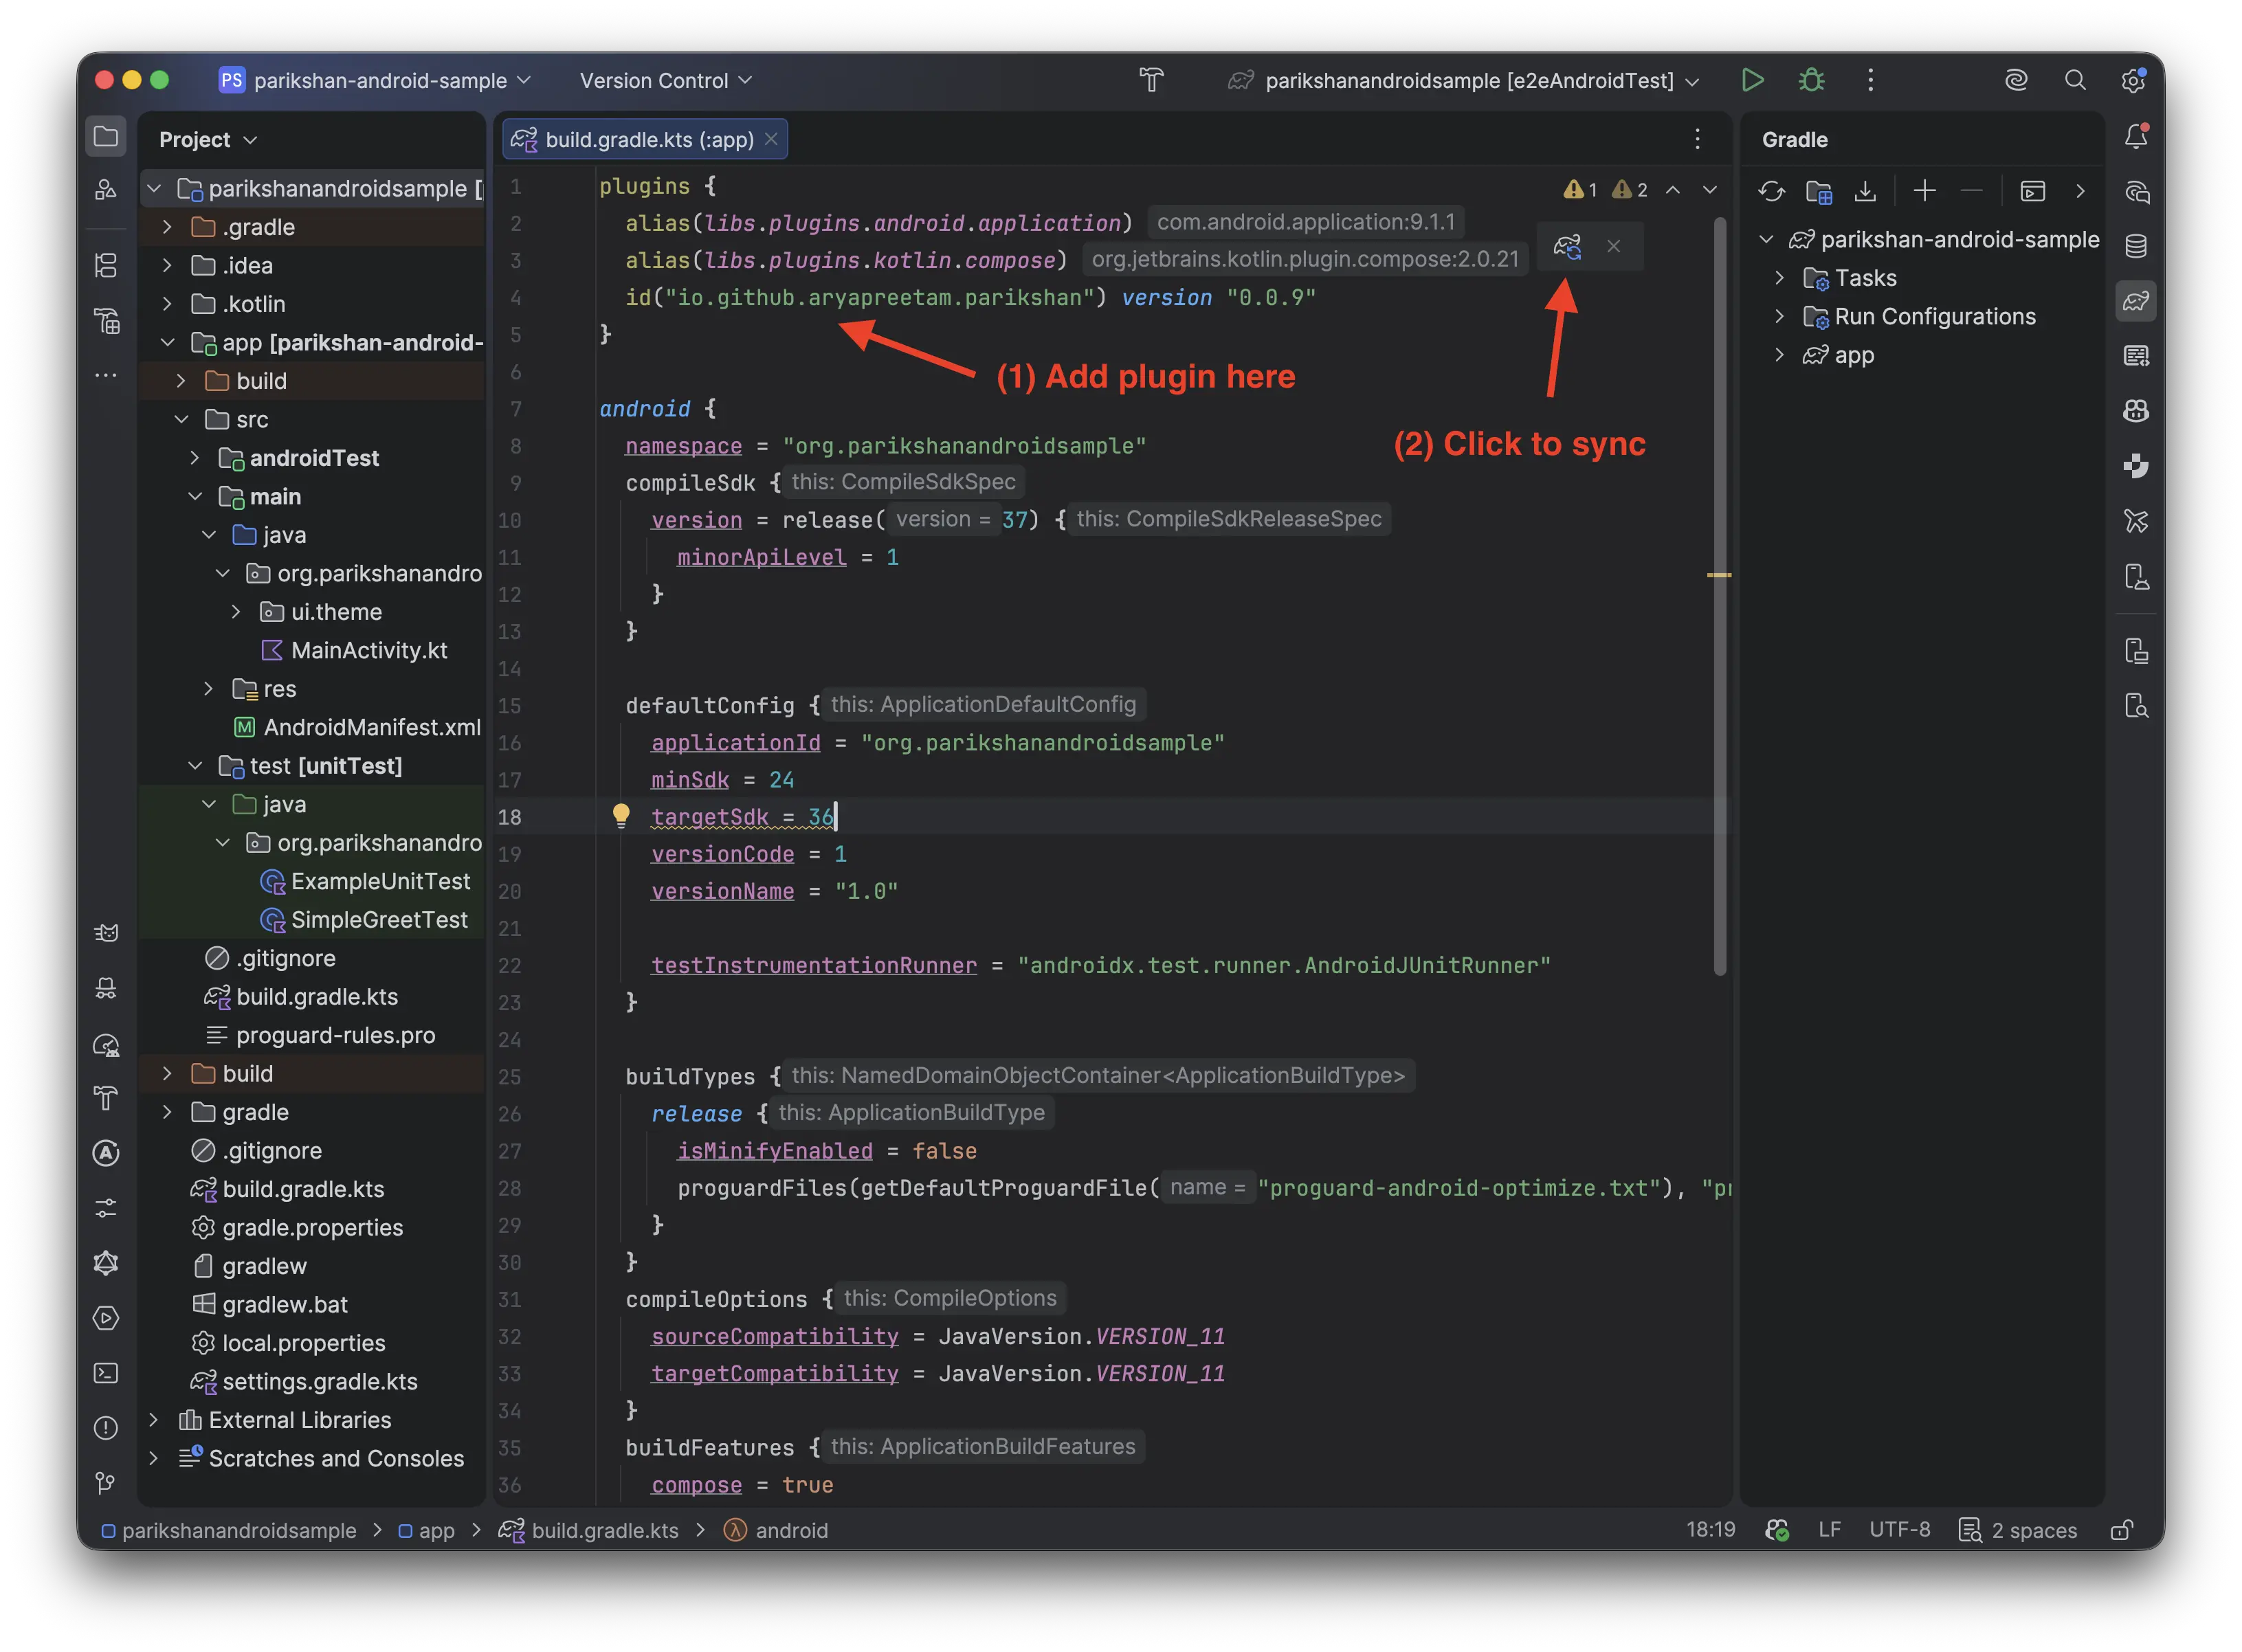
2. Apply the Parikshan Plugin
Open app/build.gradle.kts and apply the Parikshan plugin inside plugins { ... }:
plugins {
    alias(libs.plugins.android.application)
    alias(libs.plugins.kotlin.compose)
    id("io.github.aryapreetam.parikshan") version "0.0.10" // (1)
}
- Applies the Parikshan Gradle plugin. This automatically registers test dependencies and sets up the
:app:e2eAndroidTestand:app:e2eTesttasks.
Click Sync Now in the top-right notification banner of Android Studio.
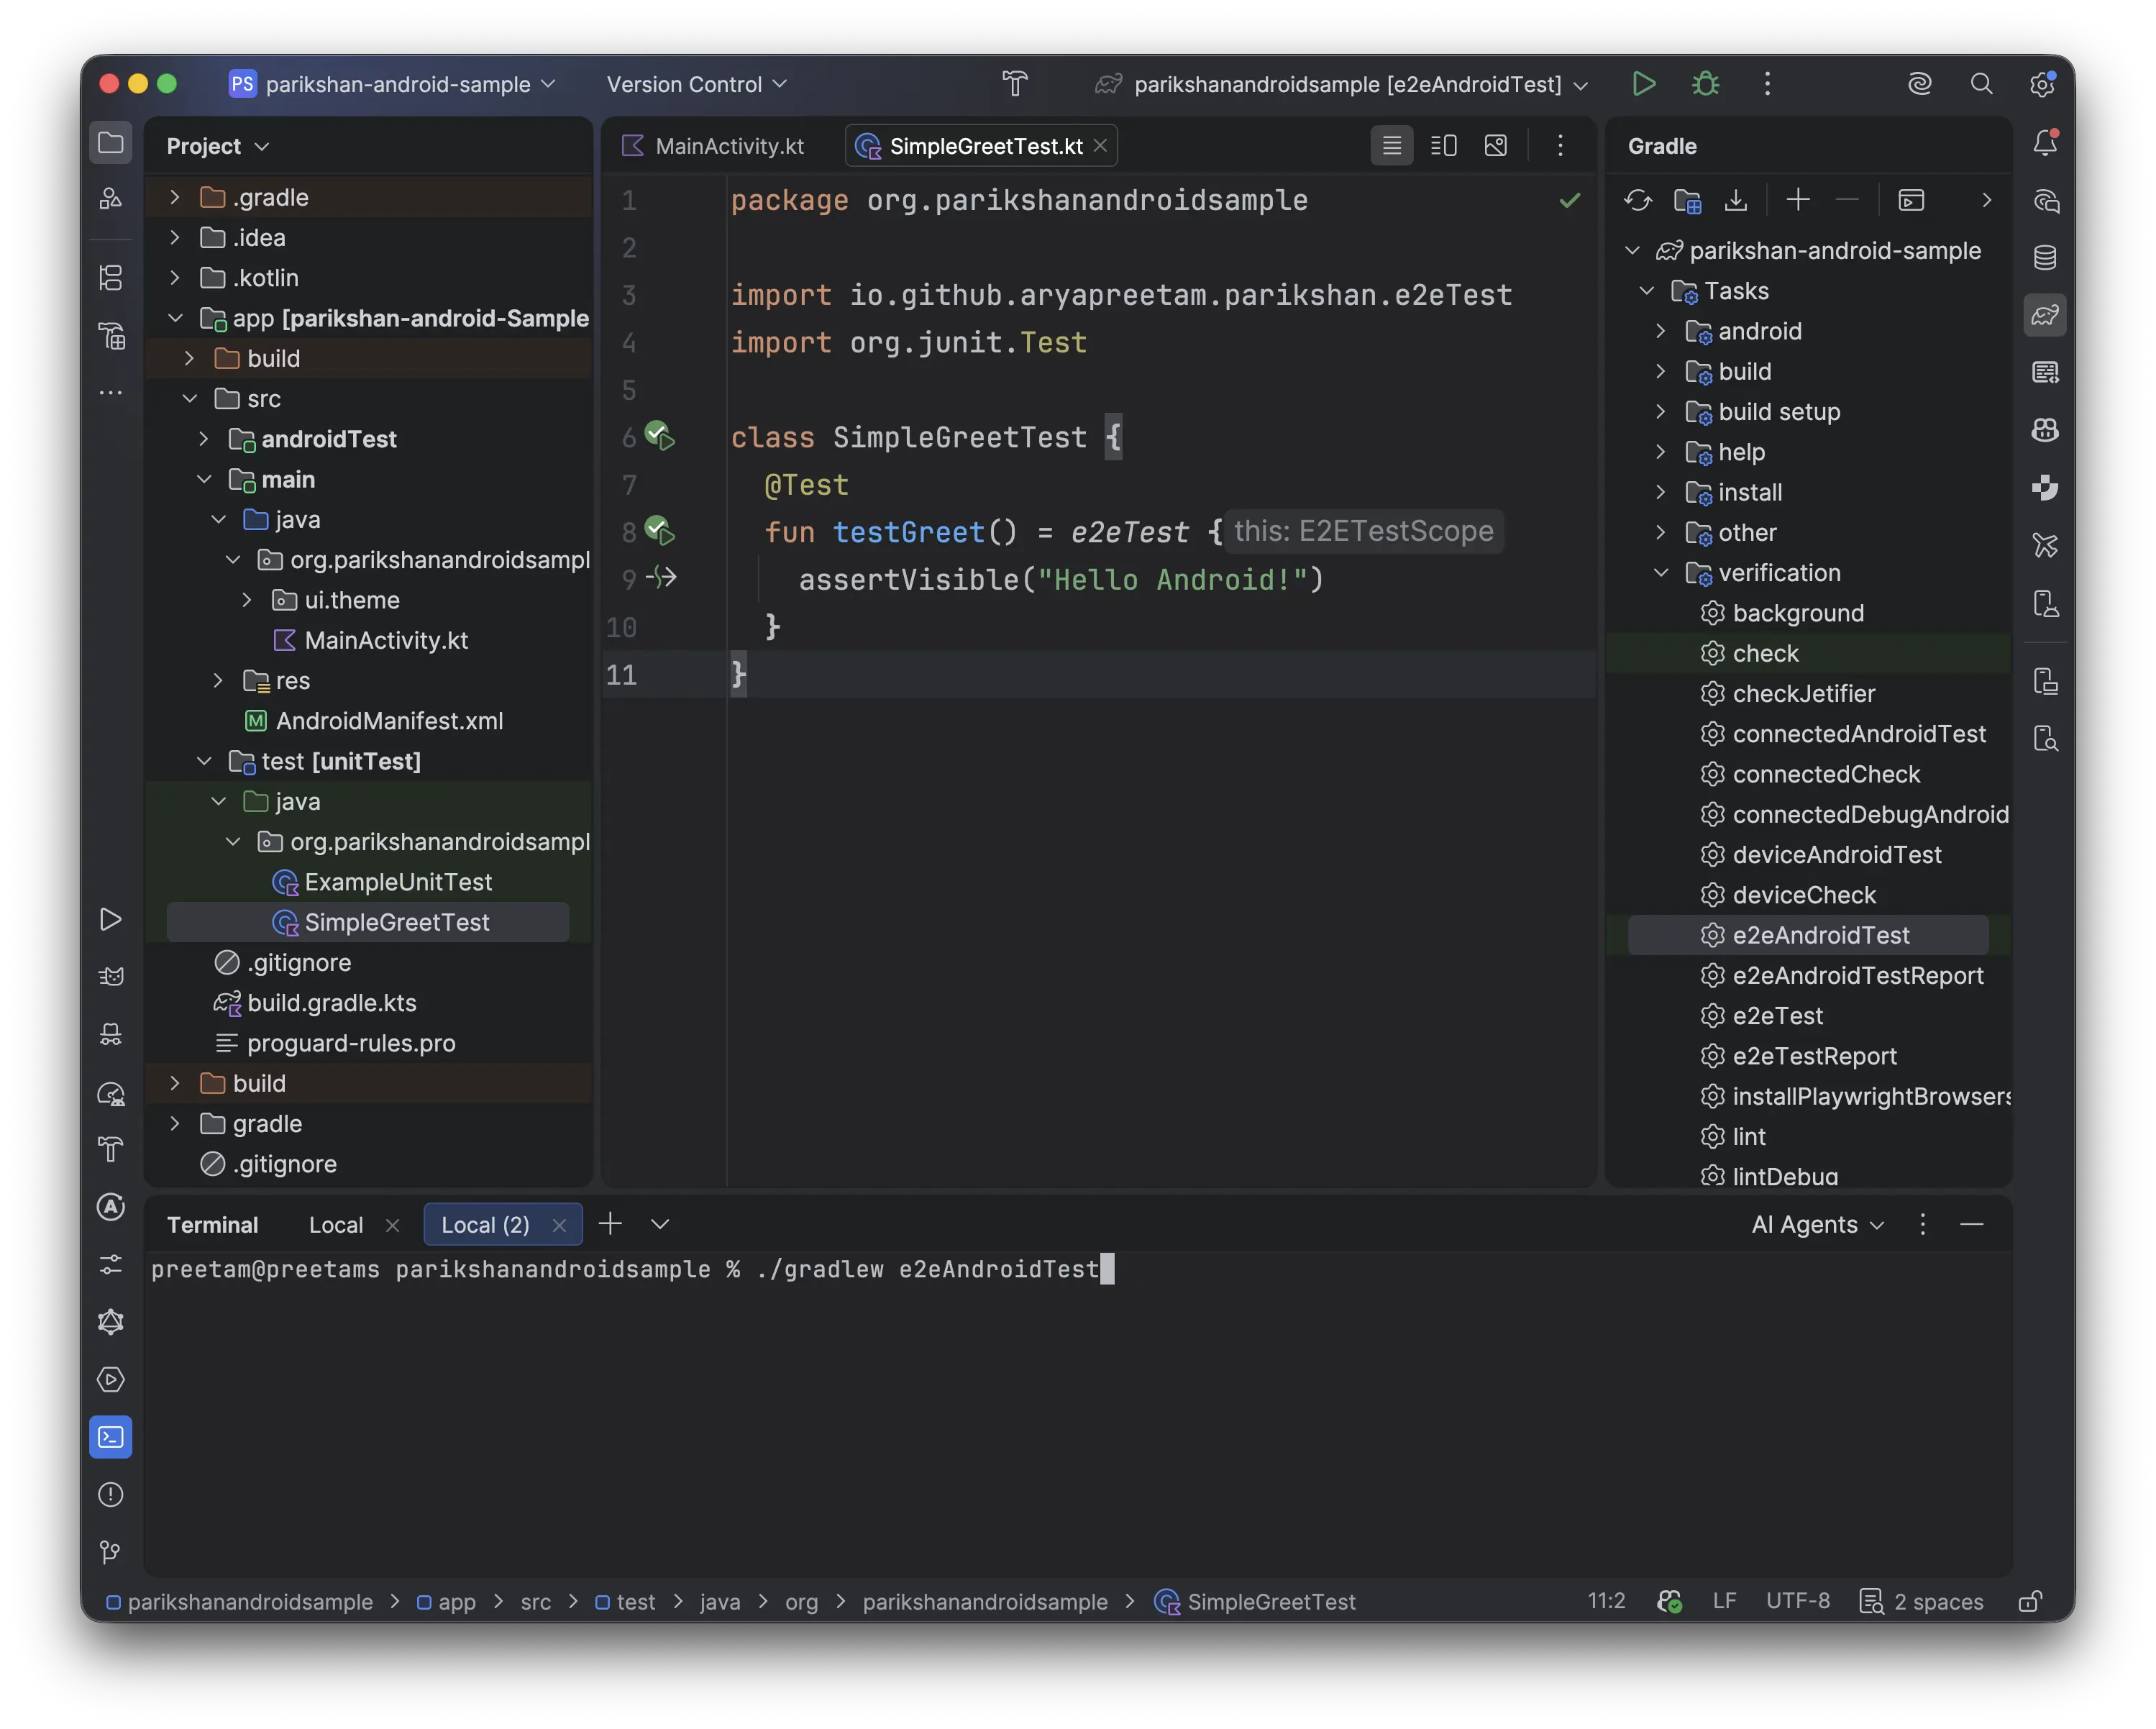
Once synced, open the Gradle tool window on the right side under app > Tasks > verification to see e2eAndroidTest registered:
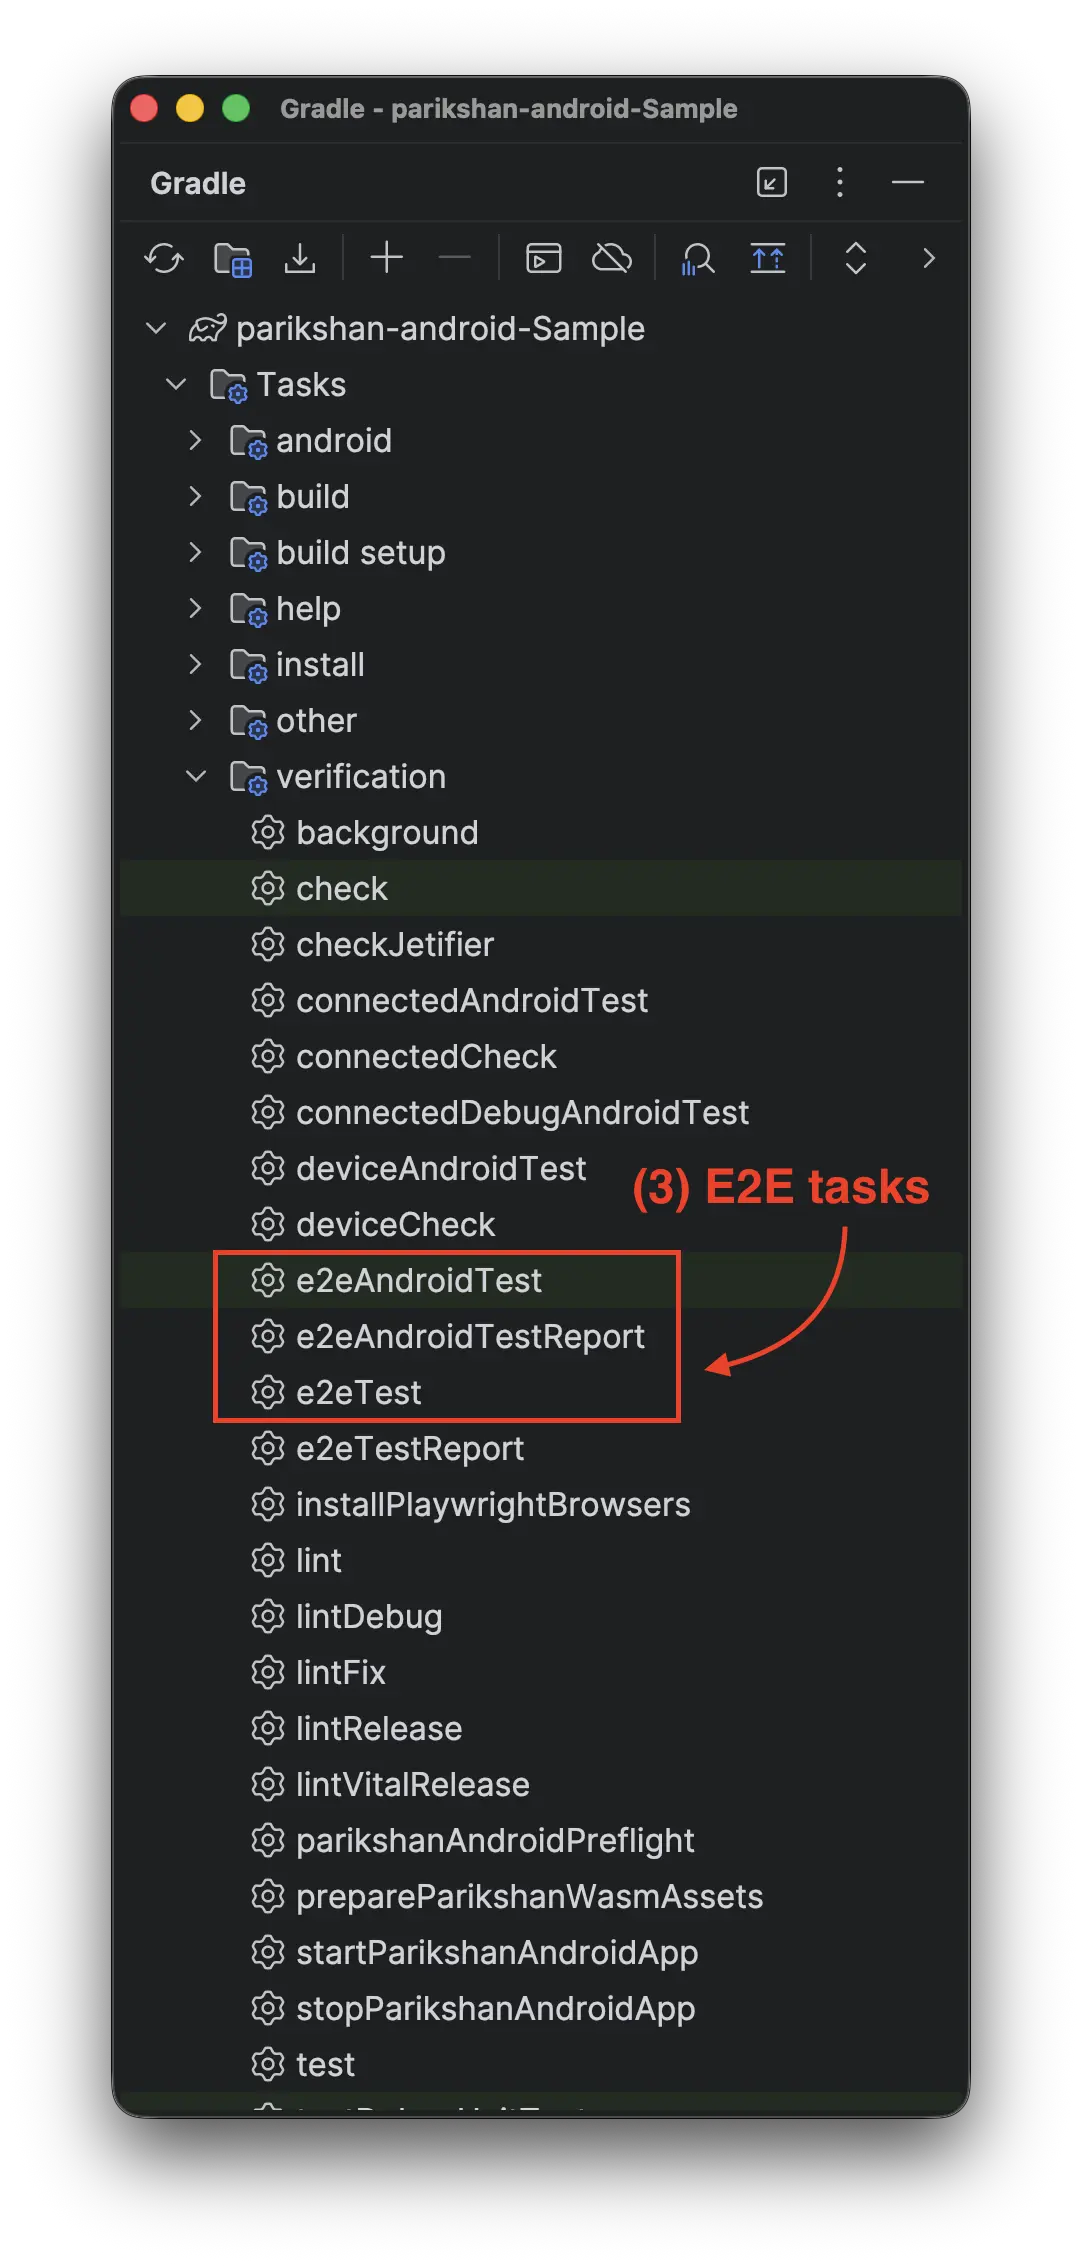
app/build.gradle.kts and click Synce2eAndroidTest task registered under verification3. Write Your E2E Test
With Parikshan, you do not need to modify your existing UI code or add custom test tags to get started. You can target text elements and accessibility semantics directly.
Create a new test class inside app/src/test/java/org/parikshanandroidsample/SimpleGreetTest.kt:
package org.parikshanandroidsample

import io.github.aryapreetam.parikshan.e2eTest
import org.junit.Test

class SimpleGreetTest {
  @Test
  fun testGreet() = e2eTest {
    assertVisible("Hello Android!") // (1)
  }
}
assertVisible("Hello Android!"): Asserts that the greeting text rendered byMainActivity.ktappears in the UI semantics tree.
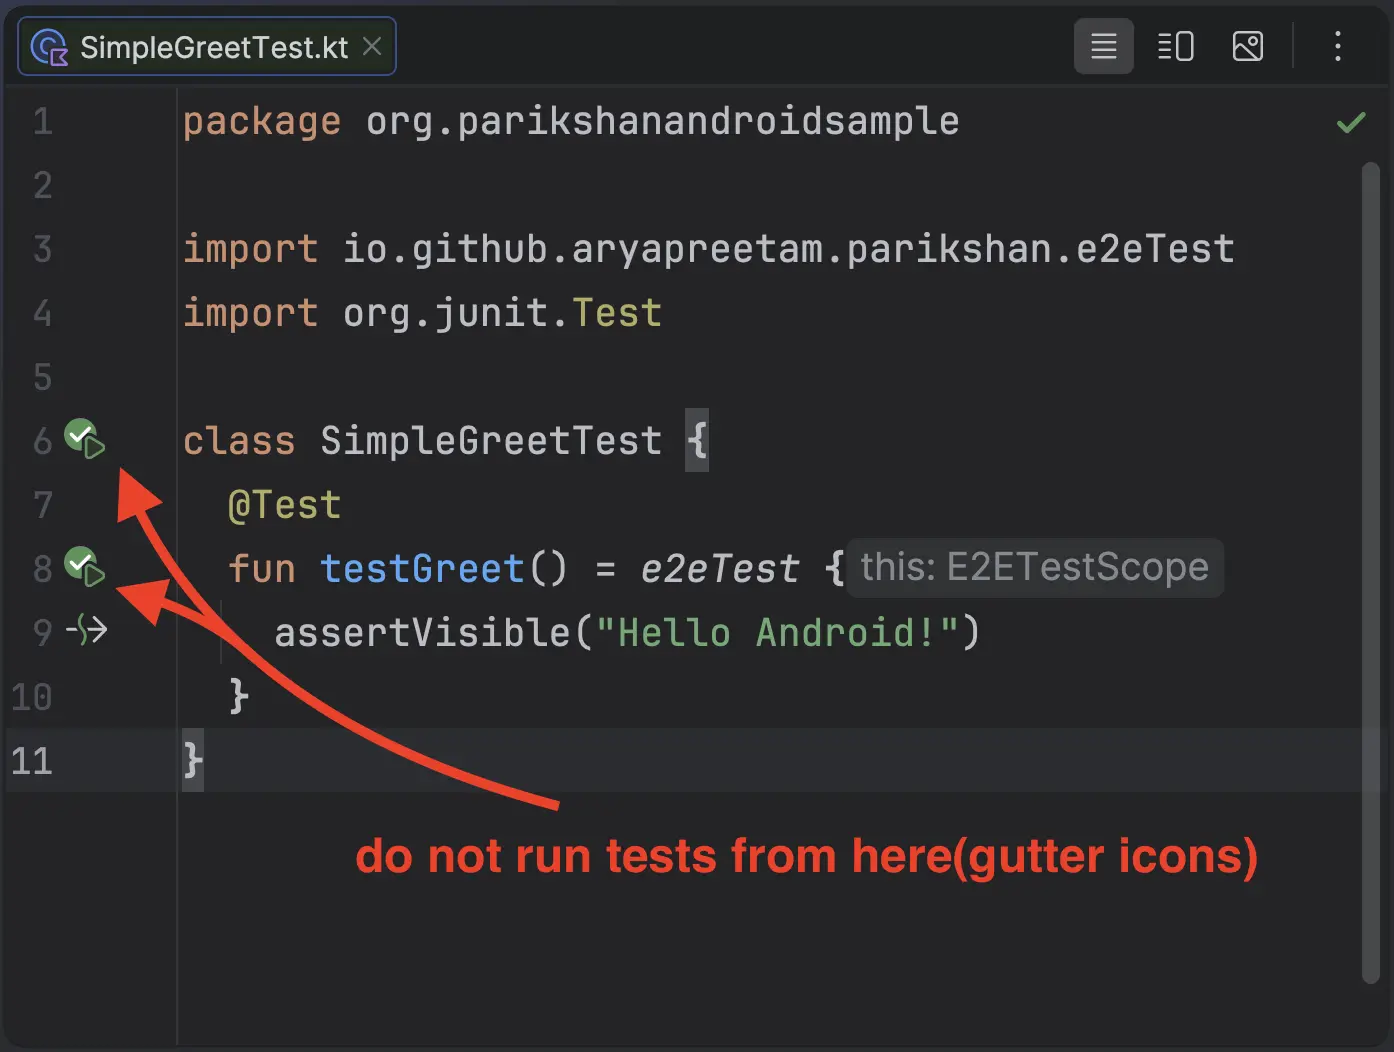
Do Not Run Tests via IDE Gutter Icons
Running tests directly via the green gutter play icon (▶) next to @Test or class declarations in Android Studio is not currently supported for Parikshan host-driven tests. Gutter icon execution will be enabled once the dedicated Parikshan IDE plugin is released.
Recommended execution methods:
- From Terminal (Recommended): Run
./gradlew :app:e2eAndroidTest(offers full CLI options, filters, and device flags). - From Gradle Tool Window: Open the Gradle tool window on the right, navigate to
app > Tasks > verification, and double-clicke2eAndroidTest.
4. Execute on Android Emulator or Device
1. Ensure an Emulator or Device is Running
Verify your device or emulator is connected via ADB:
Output:
2. Run the Test Task
Execute the test from your terminal:
(Alternatively, ./gradlew :app:e2eTest automatically executes against the Android target).
> Task :app:e2eAndroidTest
Parikshan Android: running E2E test classes org.parikshanandroidsample.SimpleGreetTest
org.parikshanandroidsample.SimpleGreetTest > testGreet PASSED

BUILD SUCCESSFUL in 5s
Visual Verification: Android Test Execution
Terminal Customization Options
Running tests from the terminal provides powerful CLI options for both e2eAndroidTest and the unified e2eTest task:
- Run a specific test class:
- Target a specific device or emulator serial:
- Enable automatic MP4 video recording:
- Run against Android with test filtering:
- Target a specific device serial:
- Enable video recording:
Troubleshooting & Common Gotchas
1. DeviceNotFoundException or "No connected devices"
- Cause: No active Android emulator or physical device is detected by ADB.
- Fix: Open Android Studio Device Manager and start an Android Virtual Device (AVD). Confirm with
adb devices.
2. Element Not Found / Timeout
- Cause: The text passed to
assertVisible()does not match the text displayed on screen. - Fix: Double-check text casing, punctuation, and dynamic string values (e.g.
"Hello Android!").
3. Screen Locked / Device Asleep
- Cause: The emulator or device screen is asleep or locked when tests run.
- Fix: Wake and unlock the device before running tests: